

Let’s talk about OSAM
So “Operating System Assisted Migration”, can be used when you have Enterprise level HCX licensing. In the HCX Connector you have to download the OS agent which then you install onto the guest operating system:

Once you have downloaded it locally, you can then copy it into the guest OS and install it, it then communicates back to the Sentinel Gateway Appliance and is picked up by the HCX Manager as you can see in the above screenshot.
Now this is a good time to plug my co-workers’ blog https://www.chrisdooks.com/2022/02/24/automating-the-hcx-osam-sentinel-agent-install-via-sccm/
He discusses how to push the sentinel agent out via SCCM for Windows machines, which is much better than manually copying it across to various Windows boxes!
OSAM at this moment in time only supports KVM and Hyper-V VMs as a source, I am not saying it won’t work, but these are the only sources that are officially supported.
There is also a guest OS compatibility matrix that you can check, once again I am not saying other OS will not work, but these are the ones that have been tested and are supported :
Considerations for OSAM Deployment
Supported Guest Operating Systems
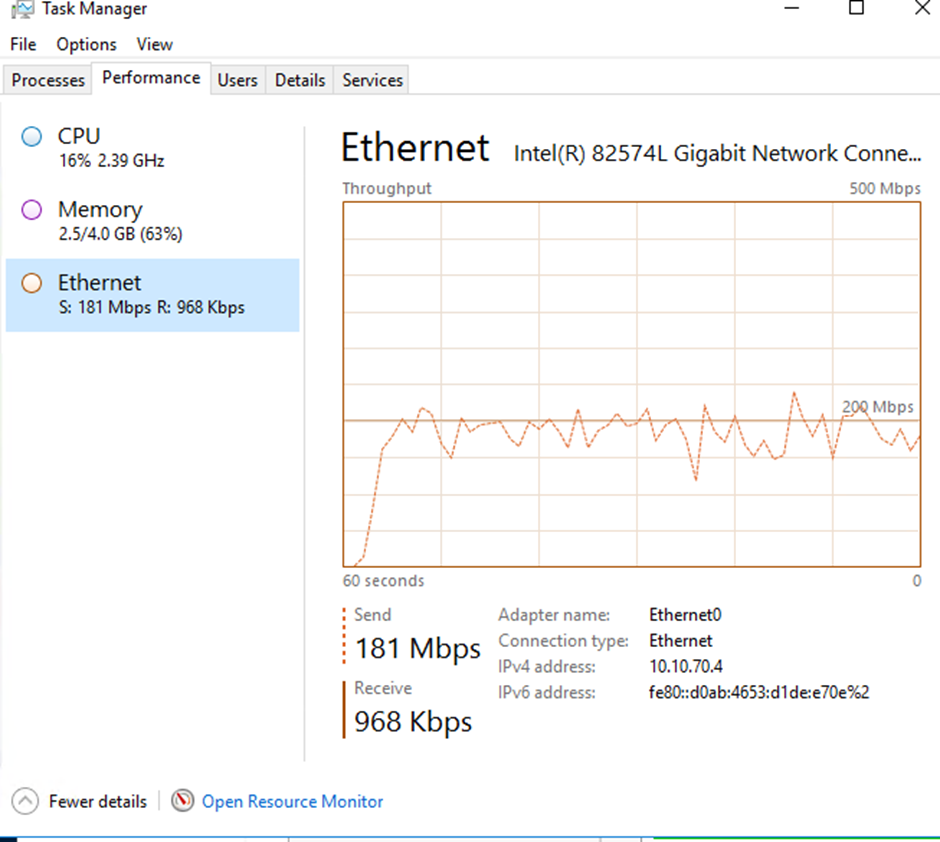
When you configure the migration up, and it starts syncing, you will of course see a lot of traffic coming out of the Server:
Just like other migration methods, it does an initial sync and then maintains a continuous sync, keeping an eye on what has changed. You can see in detail what it does in the HCX Connector:
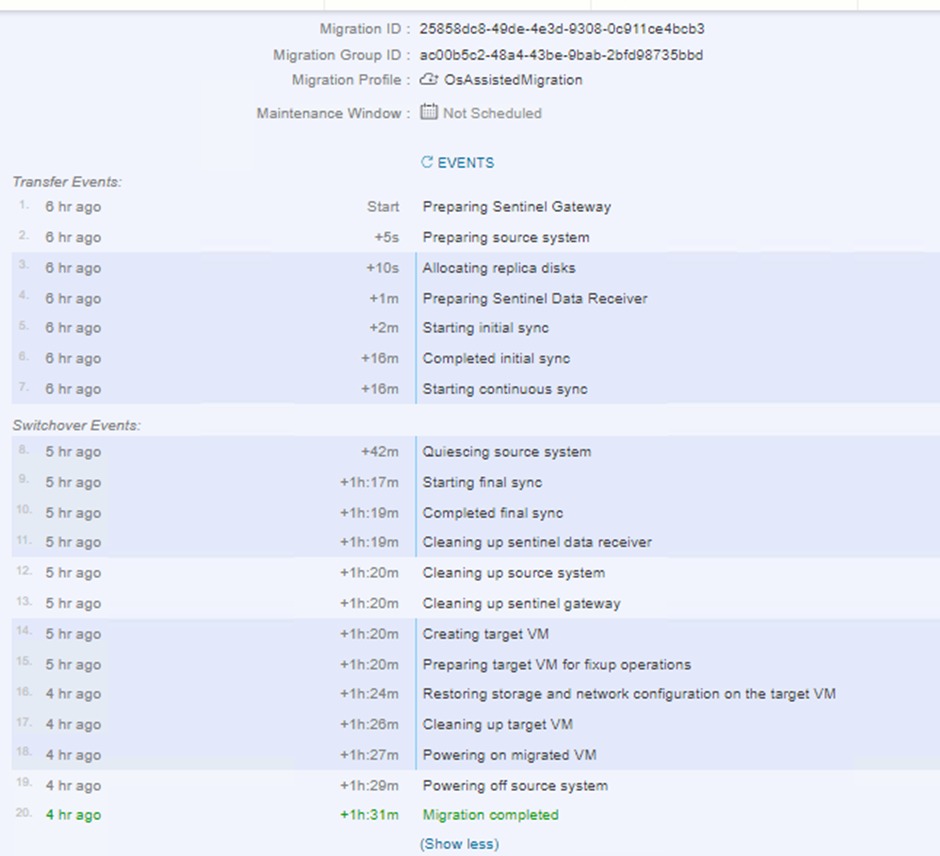
The source machine is powered off to stop any networking conflicts and the MAC address is retained and in the VM settings, you will see it is set to Manual.
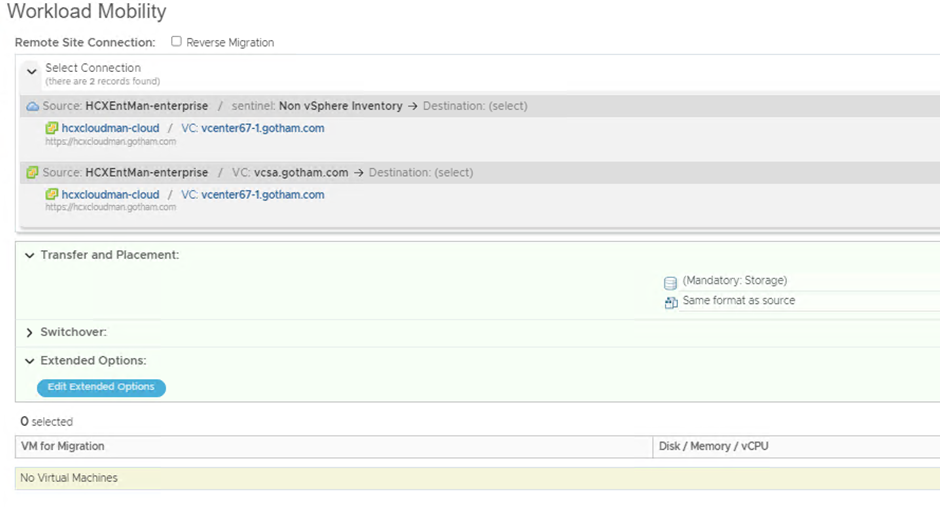
We are going to talk about PowerCLI, but you can of course migrate using the GUI, you just have to select the “Non vSphere Inventory” option:
Now Let’s Talk About PowerCLI
I have been trying to get the PowerCLI scripts I have created previously to work with OSAM, and after much testing, it seems I have hit a bug.
For the Destination vCenter Folder, it seems to want the DataCenterID instead. I have no idea why this is the case. I have logged an internal ticket for it.
The good news is that it can be worked around, and when the VM is migrated it will just end up in the root vCenter folder structure. So you will have a post-migration task to do, to put it in the folder you want.
It’s not ideal, but it will get things migrating which is what really matters!
I am using PowerCLI 12.5 and HCX Version 4.3.1
So here is the script I used, it’s a simple variation of the other scripts I have used in the past, and you can see them in my previous blog posts.
write-host("Getting Time for Scheduling")
$startTime = [DateTime]::Now.AddDays(12)
$endTime = [DateTime]::Now.AddDays(15)

Connect-HCXServer -Server  SOURCEHCXCONNECTOR

write-host("Getting Source Site")
$HcxSrcSite = get-hcxsite -source -server SOURCEHCXCONNECTOR -Type Sentinel

write-host("Getting Target Site")
$HcxDstSite = get-hcxsite -destination -server SOURCEHCXCONNECTOR -name destinationvcenter

$HCXVMS = Import-CSV 'C:\Users\batman\Documents\PowerCLI_Scripts\HCX_Scripts\HCX Migration OSAM round2.csv'

ForEach ($HCXVM in $HCXVMS) {

$HCXVMOSAM = Get-HCXVM -Site $HcxSrcSite -Name $HCXVM.VM_NAME

write-host("Getting Target Folder")
$DstFolder = Get-HCXContainer -Name $HCXVM.DESTINATION_VM_FOLDER -Site $HcxDstSite

write-host("Getting DC ID")
$DstDCID = Get-HCXContainer -Type Datacenter -Name $HCXVM.DESTINATION_DC_ID -Site $HcxDstSite

write-host("Getting Target Cluster/Host")
$DstCompute = Get-HCXContainer -Name $HCXVM.DESTINATION_CLUSTER_OR_HOST  -Site $HcxDstSite

write-host("Getting Target Datastore")
$DstDatastore = Get-HCXDatastore -Name $HCXVM.DESTINATION_DATASTORE -Site $HcxDstSite

write-host("Getting Target Storage Profile")
$DstStorageProfile = Get-HCXStorageProfile -Name $HCXVM.DESTINATION_STORAGEPROFILE -Site $HcxDstSite

write-host("Getting Source Network")
$SrcNetwork = $HCXVMOSAM.Network.item(0)

write-host("Getting Target Network")
$DstNetwork = Get-HCXNetwork -Name $HCXVM.DESTINATION_PORTGROUP -type NsxtSegment -Site $HcxDstSite

write-host("Creating Network Mapping")
$NetworkMapping = New-HCXNetworkMapping -SourceNetwork $SrcNetwork -DestinationNetwork $DstNetwork

write-host("Creating Migration Command")
$NewMigration = New-HCXMigration -VM (Get-HCXVM -Site $HcxSrcSite -Name $HCXVM.VM_NAME) -MigrationType OsAssistedMigration -SourceSite $HcxSrcSite -DestinationSite $HcxDstSite -Folder $DstDCID -TargetComputeContainer $DstCompute -TargetDatastore $DstDatastore -TargetStorageProfile $DstStorageProfile -NetworkMapping $NetworkMapping -DiskProvisionType Thin -RetainMac $True -ScheduleStartTime $startTime -ScheduleEndTime $endTime


write-host("Starting Migration")
Start-HCXMigration -Migration $NewMigration -Confirm:$false #-WhatIf

As you can see it’s the same as the others but with a new section DESTINATION_DC_ID
As you can see it still pulls the $DstFolder, but it isn’t used in the NewMigration -Folder option, it now references $DstDCID, which pulls from a new entry in the csv.
Here is the screenshot of the error you get if you try to make it reference a vCenter folder as it should:

Once you make the change, it replicates exactly a expected and ends up in your destination vCenter, powered on and ready to go! If you use my script it schedules the cutover to be 12 days in advance of the current date, but you can adjust that at your leisure.
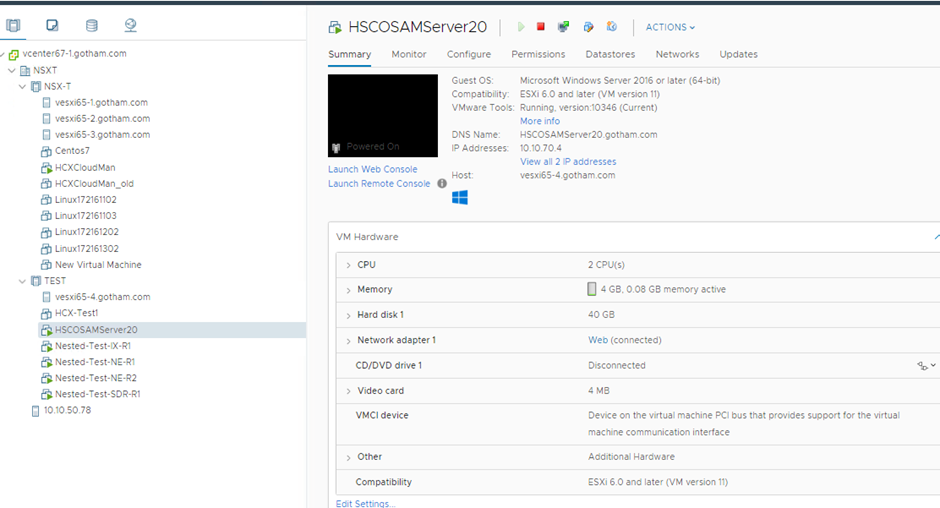
You will see the VM in your cloud vCenter, powered on and ready to use, the OSAM is also uninstalled as part of the migration process:
Leave a Reply