

After you have setup ADFS, you can start using ADFS as a Identity Provider for vCenter server.
You can follow the following screenshots as some kind of a guide on how to configure vCenter server to use ADFS.
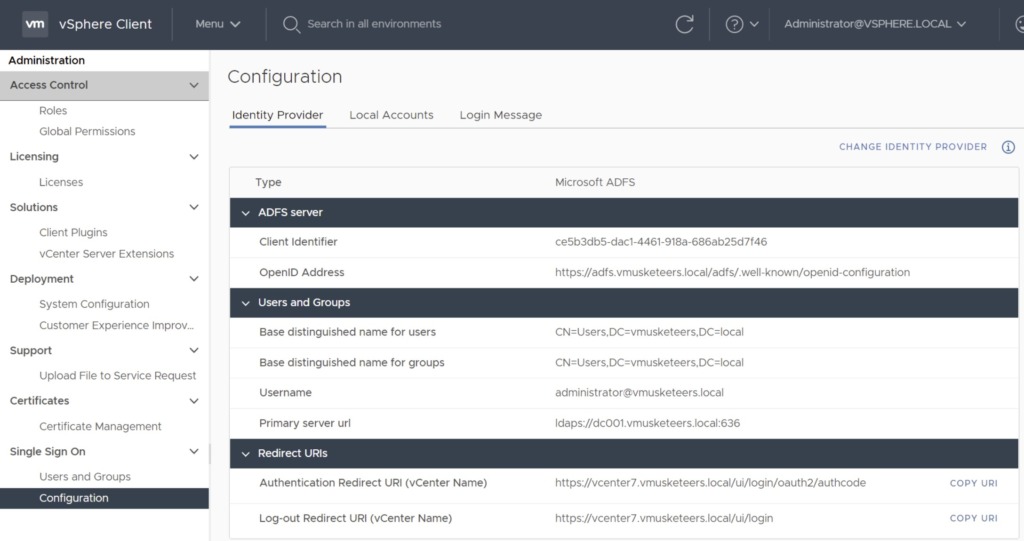
Change the Identity Provider
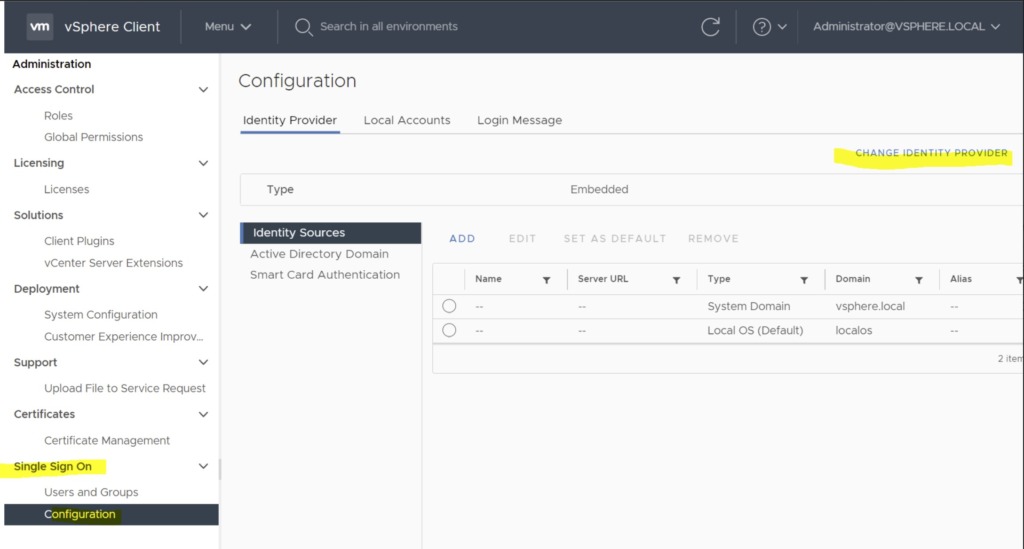
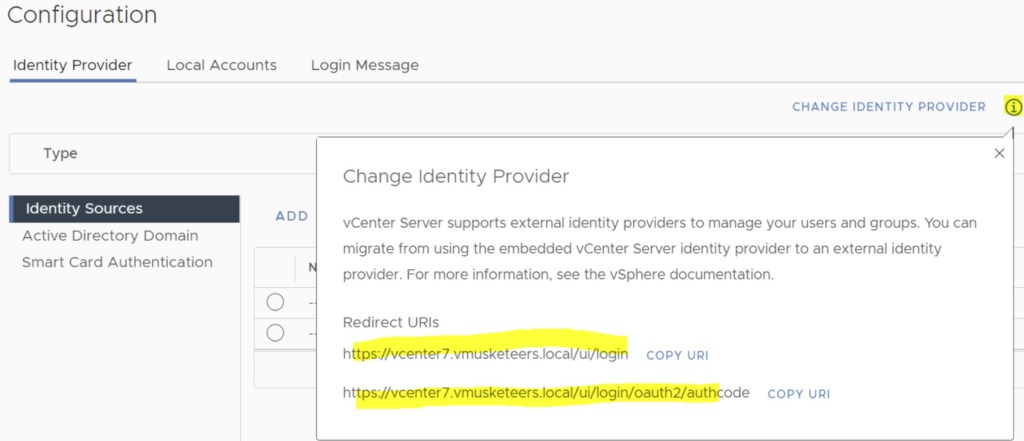
Next, copy the vCenter Redirect URIs. In my case these are:
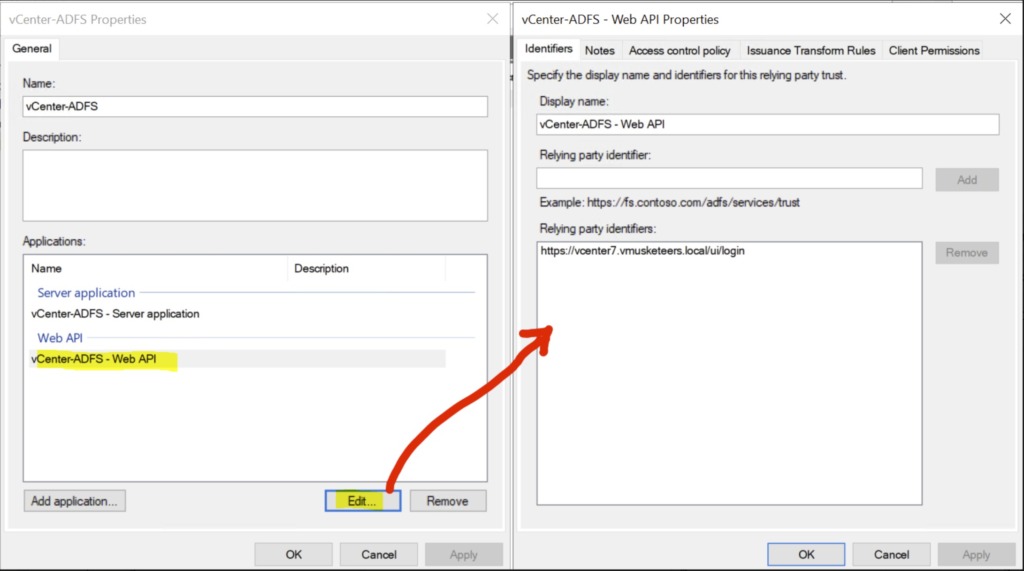
- https://vcenter7.vmusketeers.local/ui/login
- https://vcenter7.vmusketeers.local/ui/login/oauth2/authcode
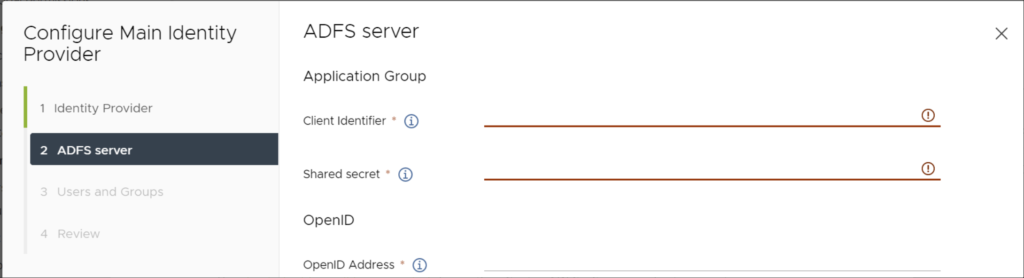
Next, from ADFS copy the Client Identifier, Shared Secret and OpenID Address. But wait, you first have to create these in ADFS!
The client identifier will be generated during the vCenter-ADFS – Server application creation in ADFS.
So now open ADFS
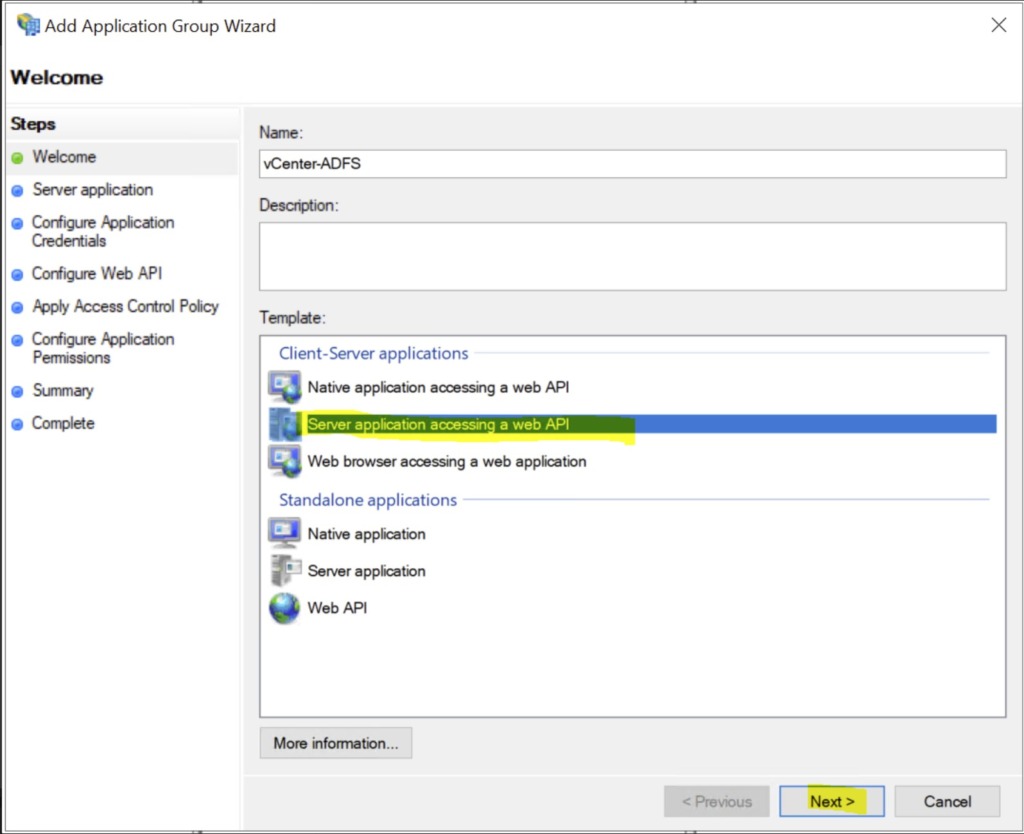
Create a new server application: vCenter-ADFS – Server application

Just follow the screenshots now
click Next
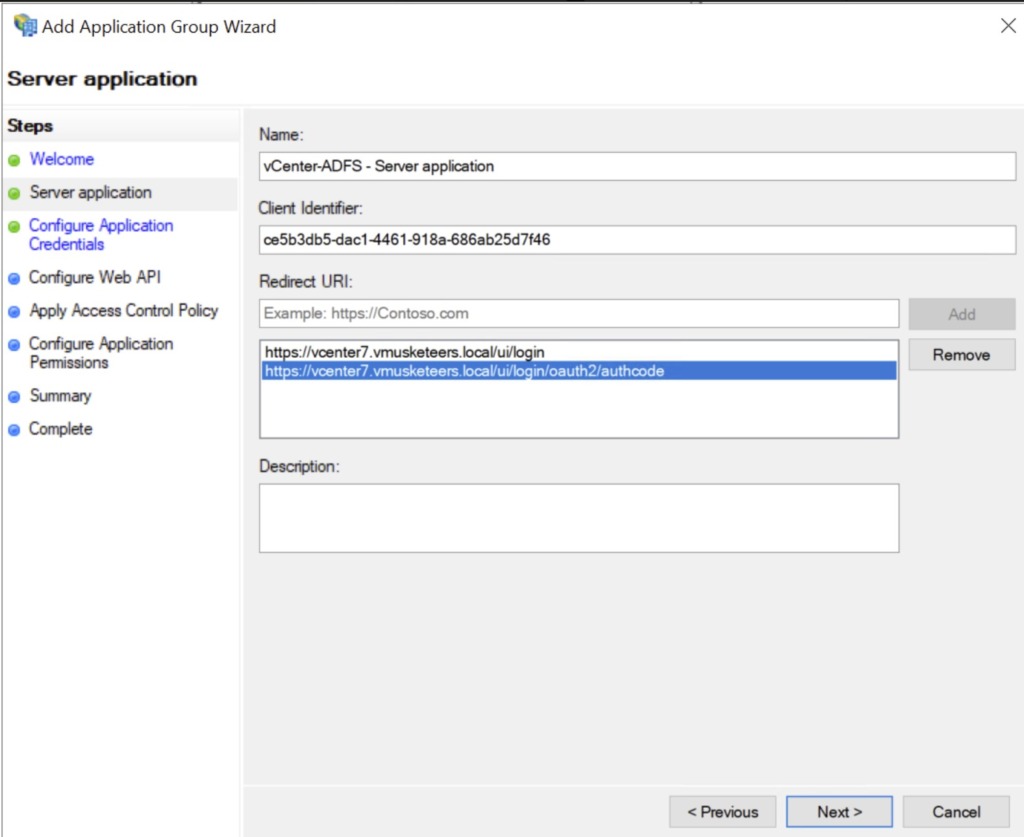
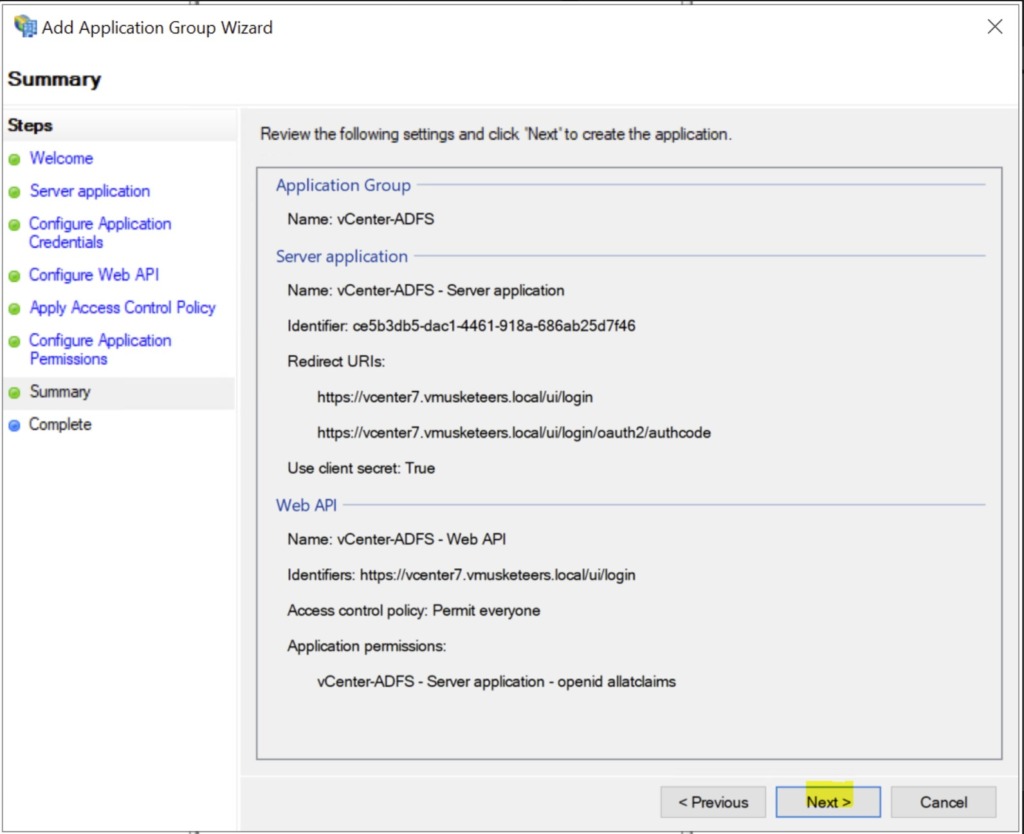
Copy the Client Identifier: 79713503-00db-48a8-910c-d089b0782ae6
Add the vCenter Redirect URI’s
- https://vcenter7.vmusketeers.local/ui/login
- https://vcenter7.vmusketeers.local/ui/login/oauth2/authcode
Copy the secret: G-Eq24F7V7I2Sk-Ejo3-BAw1UZUKI0cz7FSmDhAS
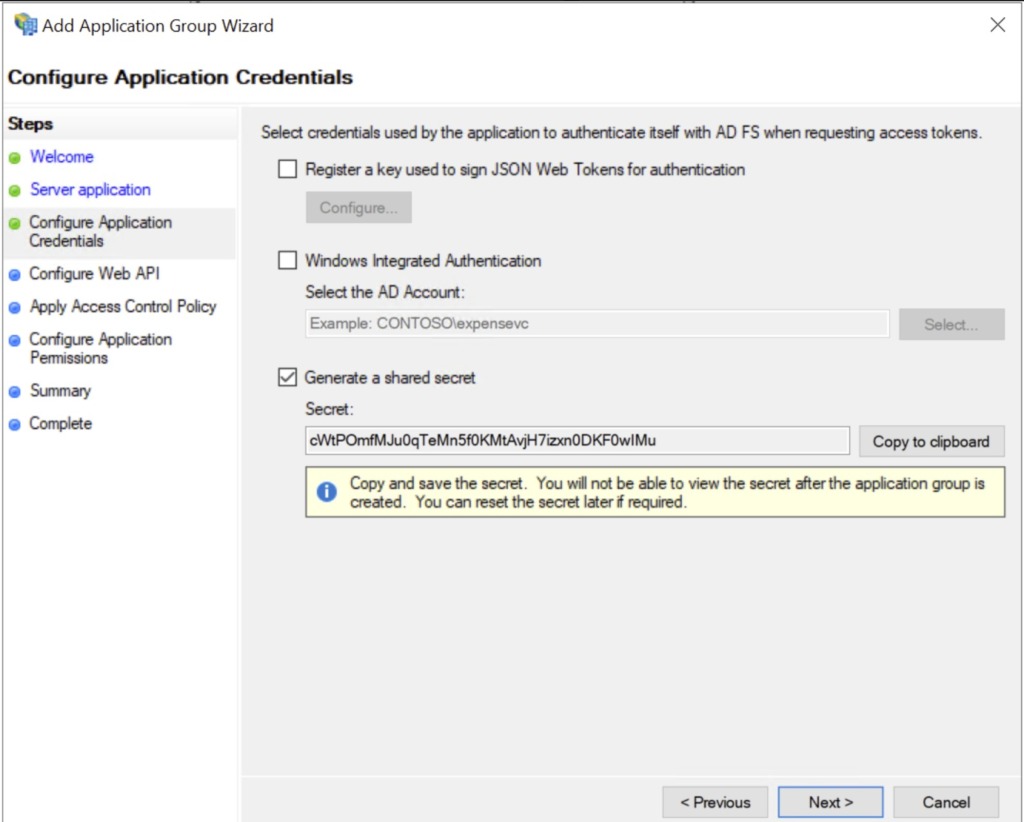
click Next
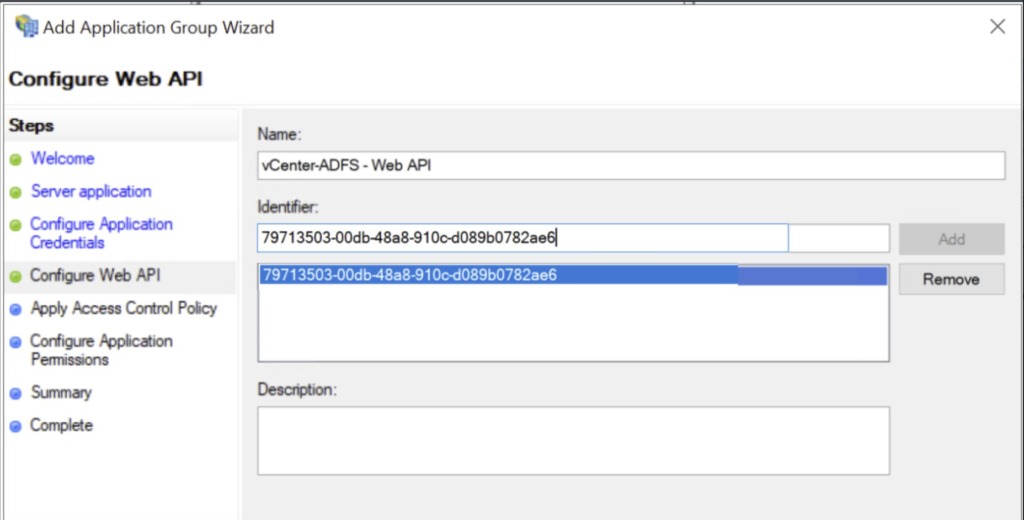
click Next
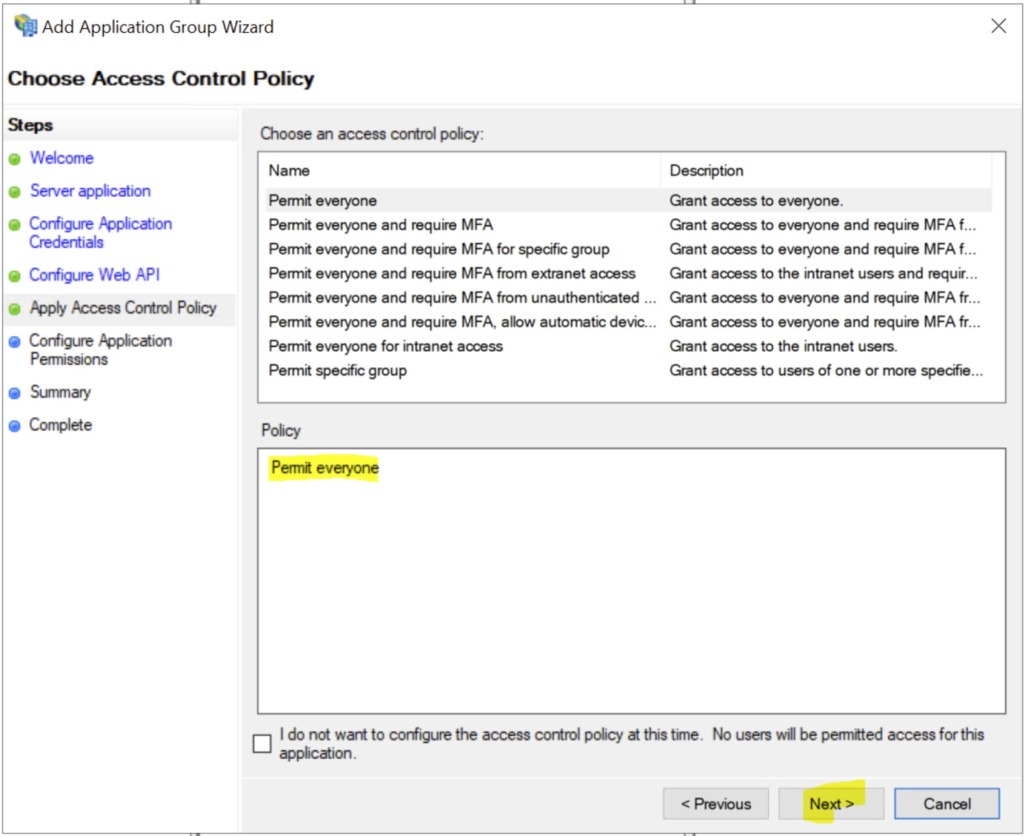
click Next
click Next
click Next
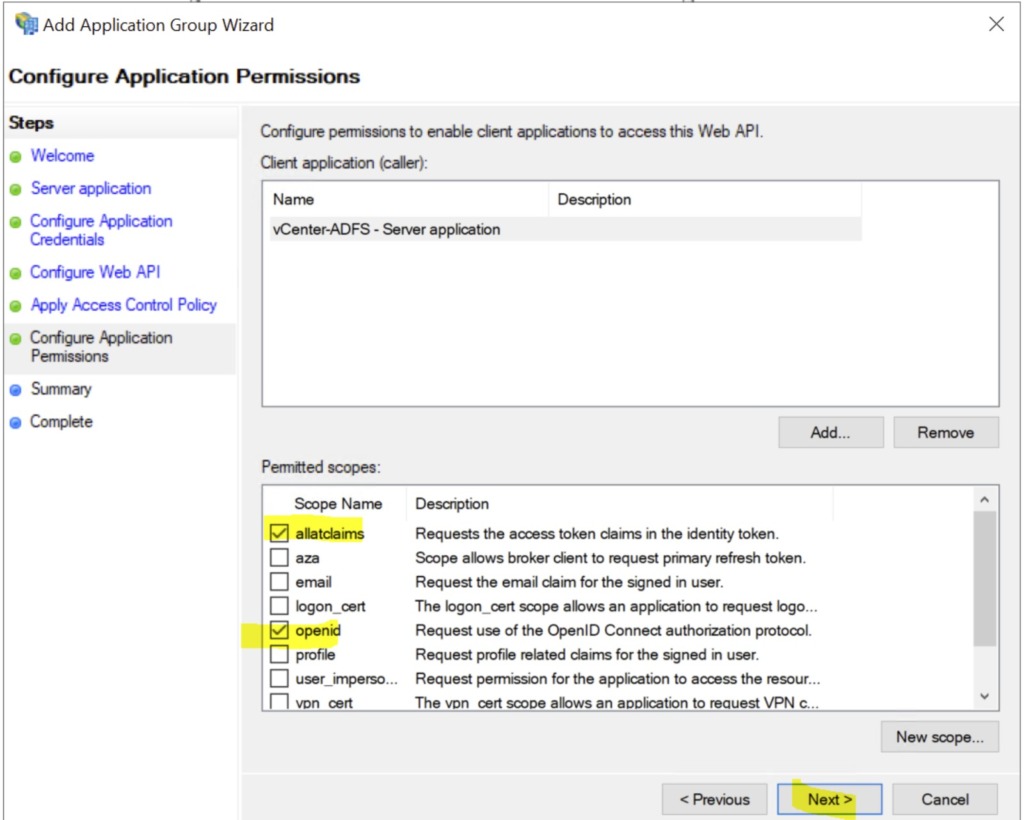
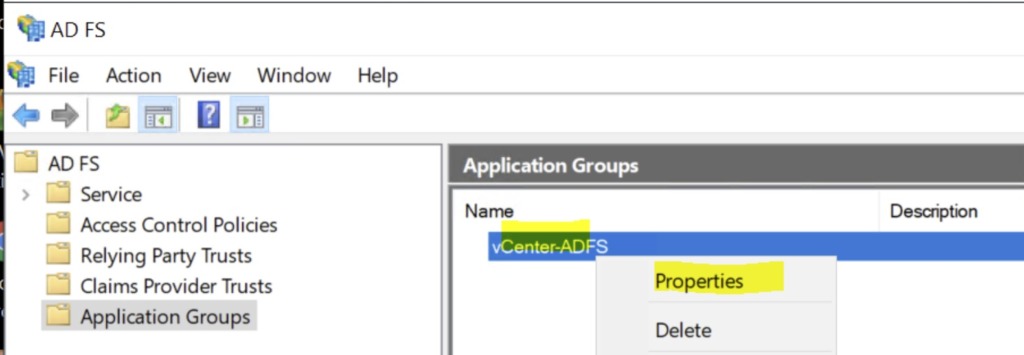
The Application Group is now created and should be listed in the Application Groups pane. In order to populate the user tokens with the appropriate information during OAuth exchanges, some additional configuration steps are needed to transform Active Directory data into token claims.
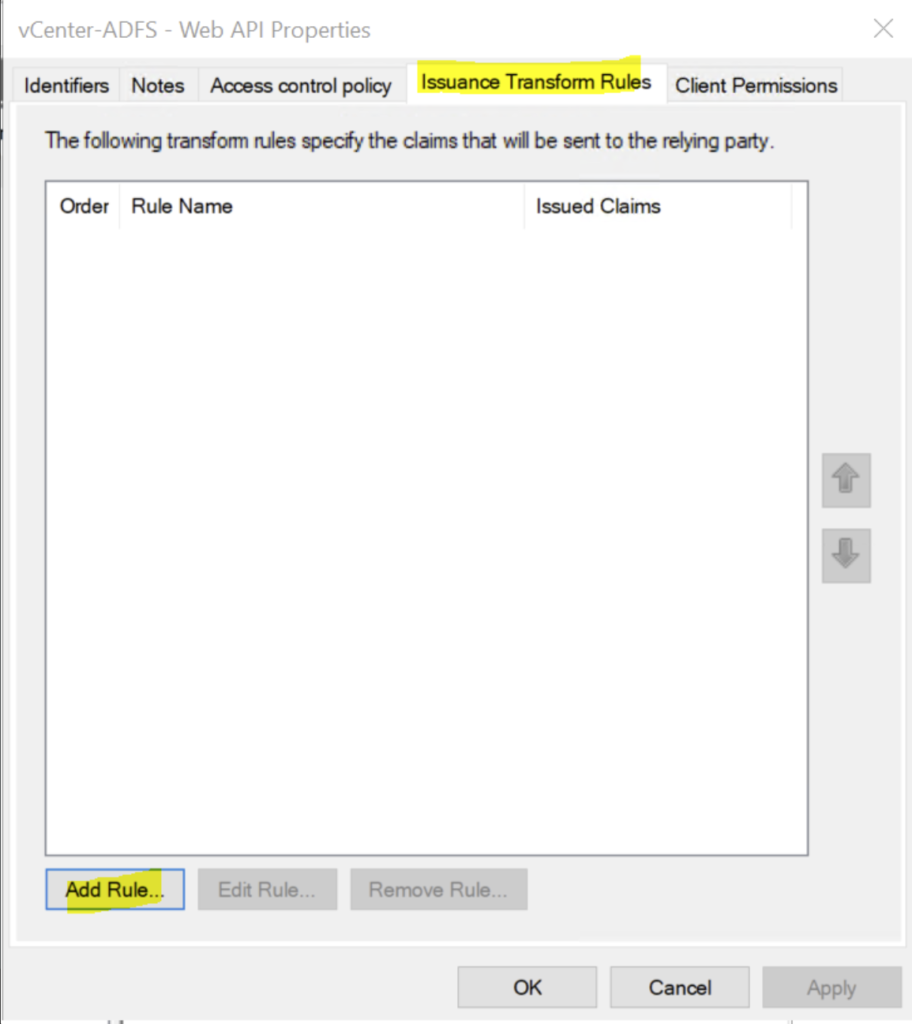
click Next
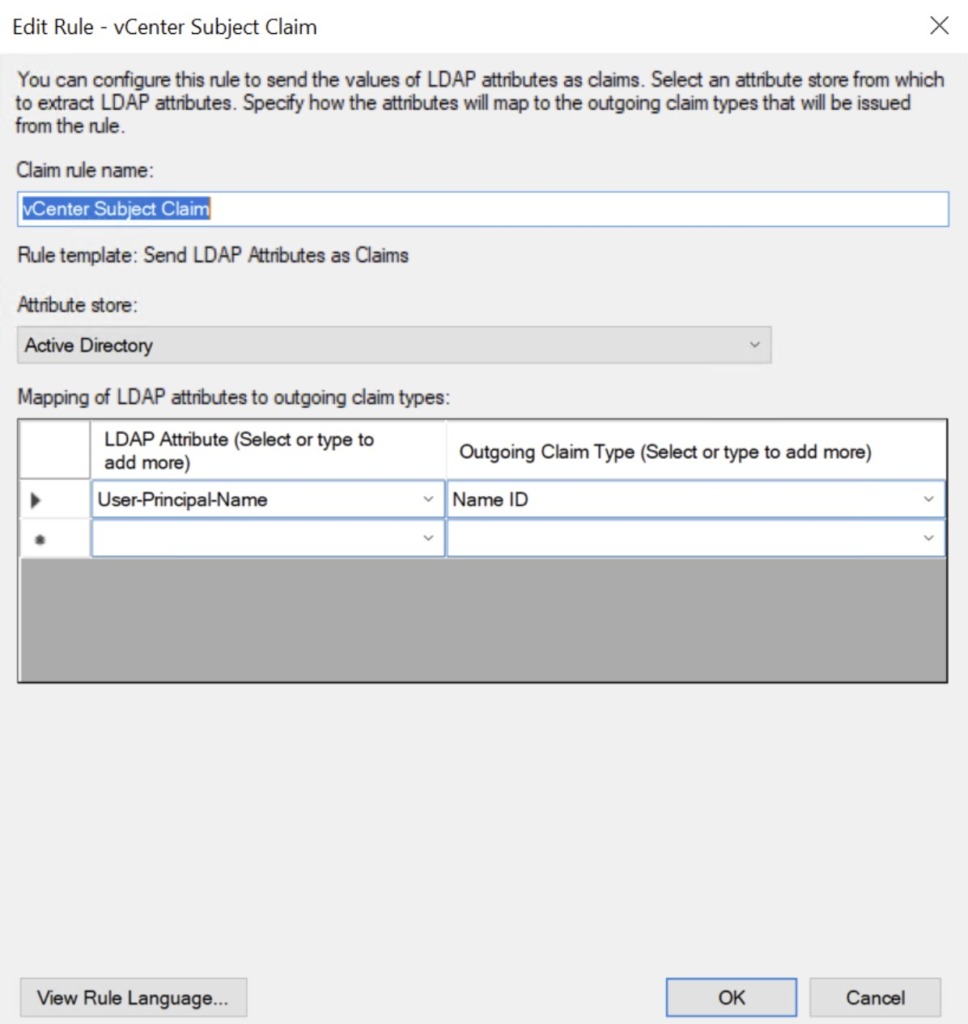
Subject Rule
- Click Add Rule
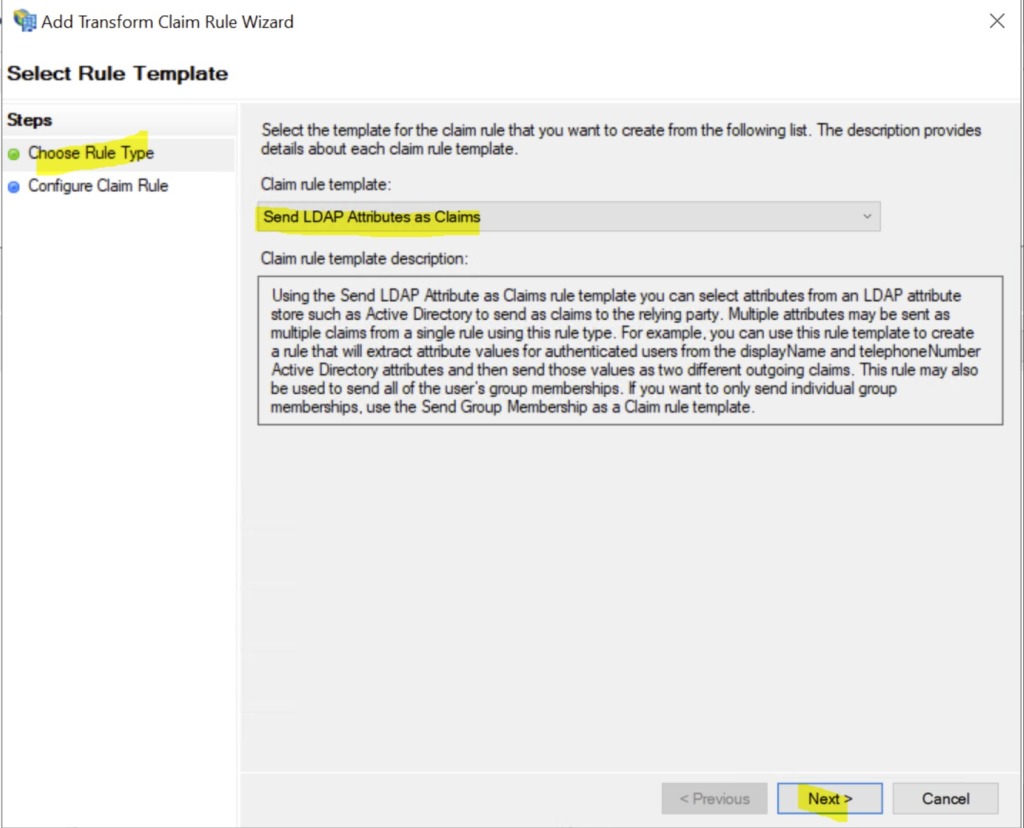
- Under Claim rule template, select the option Send LDAP Attributes as Claims and click Next
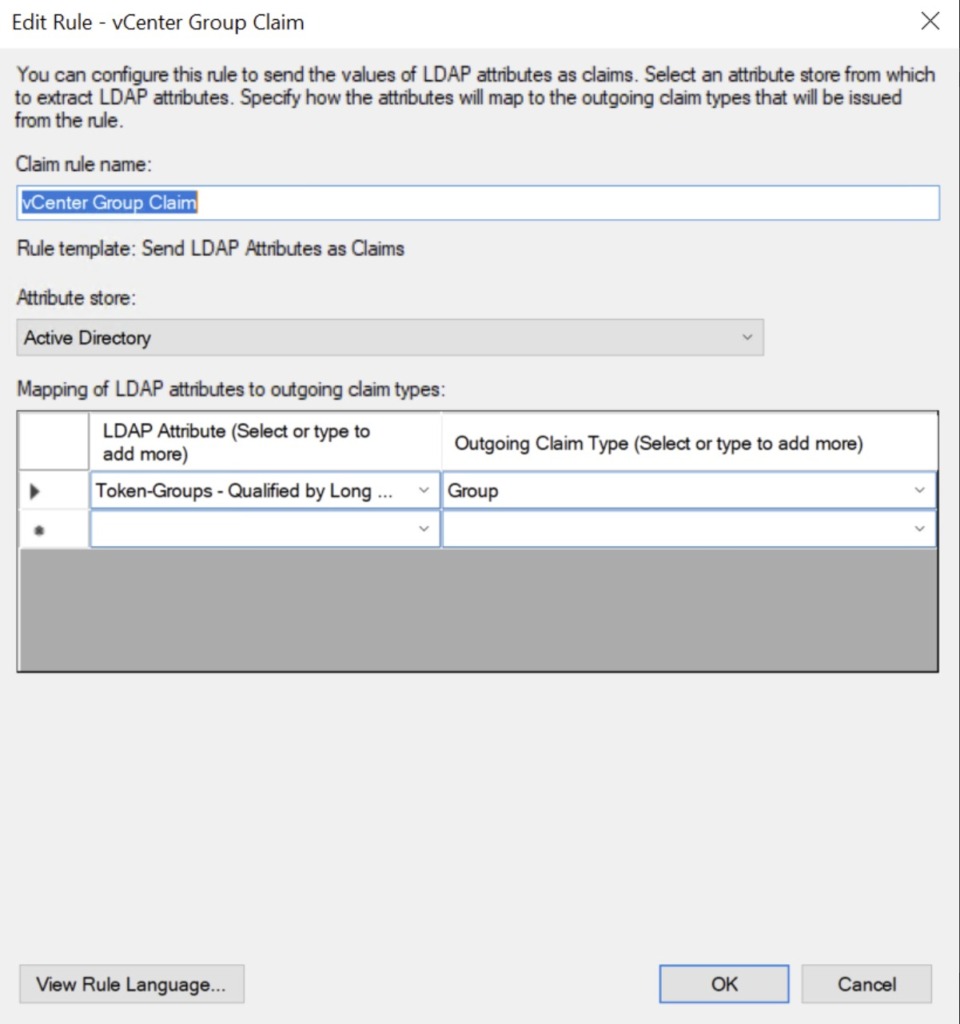
- Enter a name for the claim rule such as Subject Claim
- Under Attribute store, select Active Directory
- In the mapping table on the first row, under the LDAP Attribute column, select the User-Prinicipal-Name option
- In the mapping table on the same row, under the Outgoing Claim Type column, select the Name ID option and click Finish
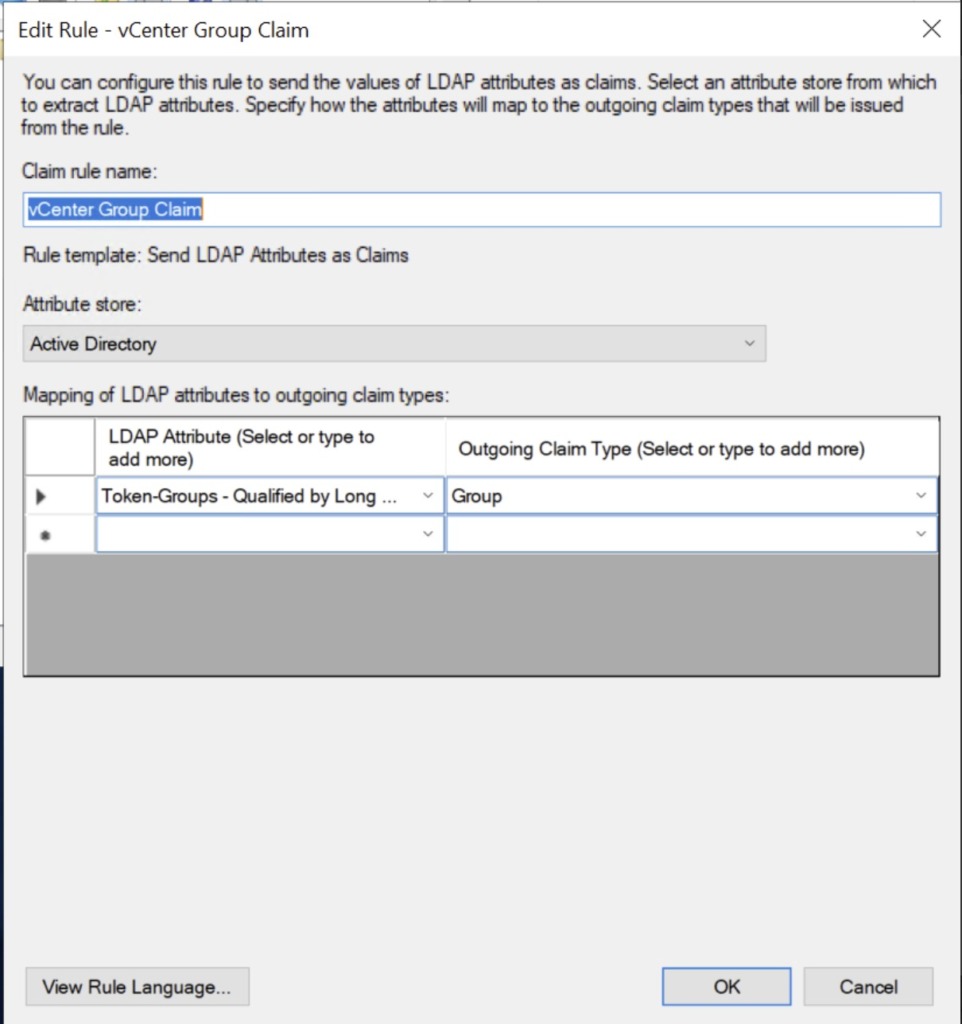
UPN Rule
- Click Add Rule
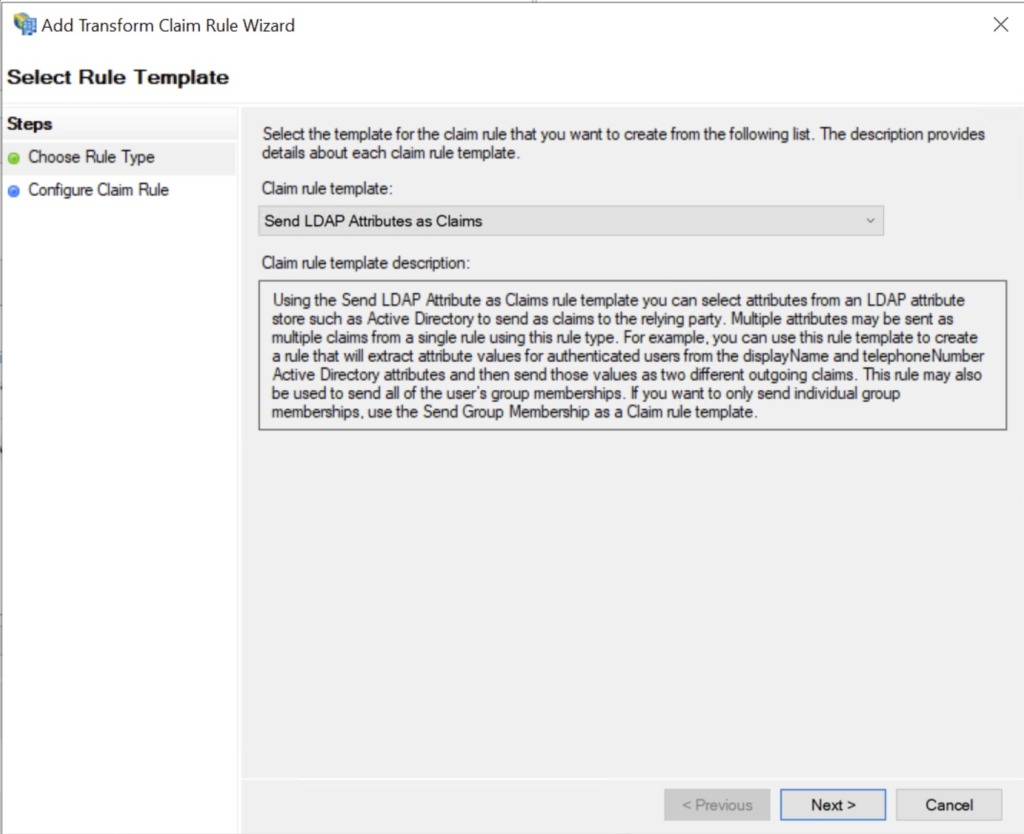
- Under Claim rule template, select the option Send LDAP Attributes as Claims and click Next
- Enter a name for the claim rule such as User Principal Name
- Under Attribute store, select Active Directory
- In the mapping table on the first row, under the LDAP Attribute column, select the User-Prinicipal-Name option
- In the mapping table on the same row, under the Outgoing Claim Type column, select the UPN option and click Finish
Add new rule
Finish
Add new rule
OpenID Configuration URL
In order to configure ADFS federation in your vCenter Server, you will need to know your ADFS server’s OpenID Configuration URL. This is the standard OpenID Connect (OIDC) Discovery Endpoint that advertises OIDC metadata information about an OAuth identity provider. It is a well-known address that is typically the issuer endpoint concatenated with the path “/.well-known/openid-configuration”. For example: https://adfsserver01.corp.local/adfs/.well-known/openid-configuration
To obtain the OpenID Address for your ADFS server:
- Open a PowerShell terminal on your ADFS server as an Administrator
- Execute the following command:
Get-AdfsEndpoint | Select FullUrl | Select-String openid-configuration
- Copy the URL that is returned (select only the URL itself, not the closing bracket or the initial “@{FullUrl=” part)
- Use this URL whenever vCenter asks for the OpenID Address

@{FullUrl=https://adfs.vmusketeers.local/adfs/.well-known/openid-configuration}
Go back to vCenter
complete the information
Leave a Reply