


Load Balancing.
I covered Avi Networks at a high level in my first post. I now want to dive into the base configuration of Avi and at its core, it is a Load Balancer. Saying that there are a few flavours of Load Balancing.
Layer 4 Load Balancing. – Focusing on the IP address and TCP port.
Layer 7 Load Balancing. – Focusing on layer 7 attributes such as HTTP headers.
Global Server Load Balancing. – Adopting the layer 4 and layer 7 concepts to balance applications across geographical regions.
While running through the base configuration I will be focusing on layer 4. While layer 7 and GSLB is something I eventually want to play with it will be further down the line.
Concepts.
Avi is the same conceptually as other Load Balancers.
The base configuration will require a Virtual Service (VIP) which clients hit, this then passes the traffic to an assigned Pool, which in turn has associated members. These members are typically monitored on the port they are meant to be servicing traffic on, HTTP or HTTPS for example.
One great thing about Avi is the Virtual Services, Pools and Members, all have associated health scores based on an Avi calculation. This will provide a score from 1 to 100 with 100 being 100% healthy and anything below that requiring validation.
Configuration.
Avi Controller.
Let’s focus on the Controller installation for a second. I would recommend you read the knowledge base article, which can be found here:
https://avinetworks.com/docs/18.2/installing-avi-vantage-for-vmware-vcenter/
The most important thing to take away during the controller installation phase is the “modes”. For the purpose of my demo, I have used Write Access Mode as I want the controllers to have the freedom to spin up and down SE’s without manual intervention. This is also the model I will be pushing in production.
Write Access Mode – Auto-discovery of vCenter elements and auto-deploy of SE’s.
Read Access Mode – Auto-discovery of vCenter elements and manual deployment of SE’s.
No Access Mode – Manually discovery of vCenter elements and manual deployment of SE’s.
Guidelines.
There are lots of ways to setup Avi and each way will provide pros and cons, it’s important to pick the configuration that provides you and your business the best results. I will be running through a configuration to get you up and running for a proof of concept. Further posts will dive into auto-scaling and redirections.
There are a number of guides on the Avi Networks site:
https://avinetworks.com/docs/latest/guides/
I recommend you sift through them if you want specific details on configuration options.
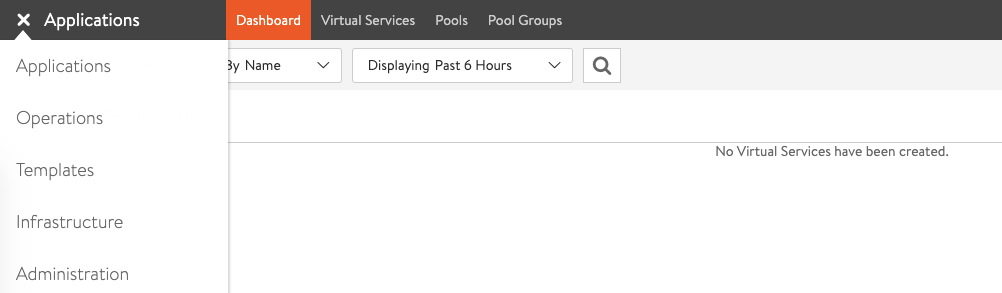
Before we start let’s take a look at the GUI. It’s set out in a fashion you are familiar with, the tabs at the top of the page allowing you to navigate through the different sub-menus and there is a burger menu where you can switch between the key areas (e.g. Applications and Administration).

I will assume at this stage, the Avi controllers have been deployed. In my case, this is a stand-alone controller, but they can be deployed in a 3 node cluster.
Infrastructure Configuration.
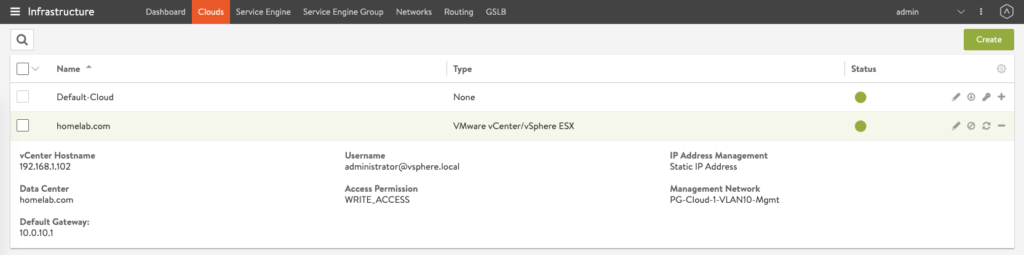
Before I start configuring VIPs and Pool, we need to set up a few infrastructure elements. Let’s start by creating a cloud. Navigate to the Infrastructure > Clouds section and click Create. Type in the cloud name, for me this was homelab.com and select VMware. The next screen will ask you to provide all of your vCenter information. The data center section is providing an area for the SE’s to be deployed. Finally, the network is an area to define the mgmt. network parameters for the SE’s. This should provide you with a new cloud to call your own.
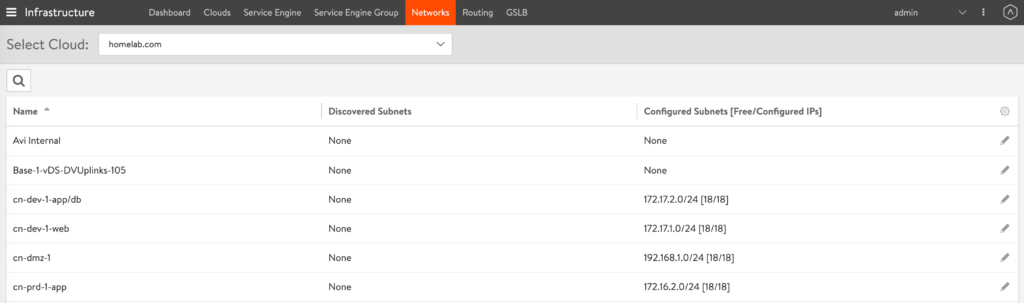
Move into the Networks tab and start creating Networks for the SE’s. The port-groups will be discovered from the linked vCenter and you now need to assign IP pools that can be dynamically used by the SE’s. The mgmt. pool will already have the subnet configured as you defined it in the Cloud section. The bare minimum here needs to be an uplink network for the VIPs and a downlink network for the pool member interfaces (inline). This is similar to HCX network profiles if you have seen any of my HCX presentations (here).
N.B. Always ensure you are working in the correct cloud (homelab.com) as flicking between the windows/tabs has the tendency to reset the selected cloud to the default cloud.
If you are using NSX-T you will notice the segments configured on an N-VDS will not appear. This is not currently supported. Like me, If you have upgraded to NSX-T 3.0 and migrated the N-VDS to a VDS, you will now see your NSX-T segments appear in the network section. I need to confirm is this is a supported configuration.
Navigate to the Service Engine Group tab where you select the correct Cloud and create a Group. This is a group of SE’s that can be used to serve the Load Balanced content. If you are familiar with NSX-T, think of SE’s like the Edge Transport Nodes and the Group as the Edge Cluster.

VIPs and Pools.
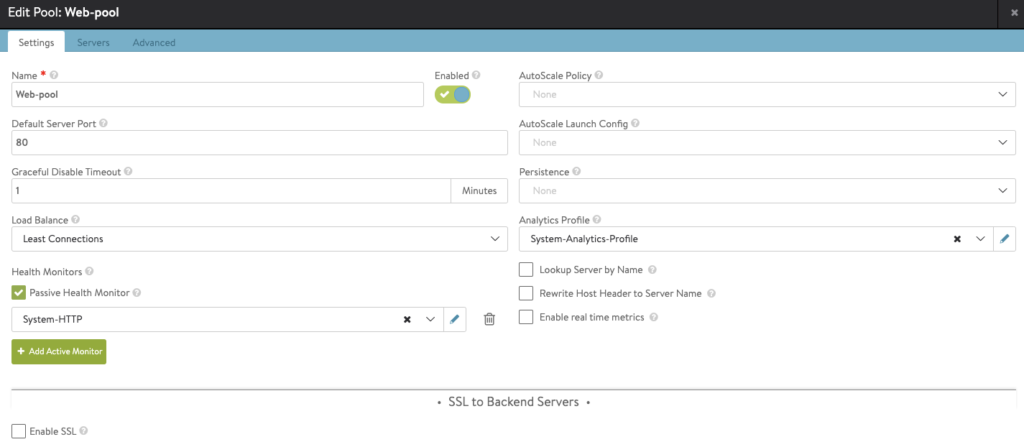
We can now move onto the VIPs and Pools part of the configuration. Navigate to the Applications > Pools area of the configuration and create a new pool. Interestingly you are able to select a NSX-T VDS segment at this stage.
Navigate to Virtual Services and create your VIP. If this is your first VIP, the Avi SE’s will be deployed after the first VIP is saved. The method of deployment will be based on the Avi Manager configuration and the Service Group configuration. NSX-T VDS segments can’t be selected for the VIP.

You should now have Avi Load Balancing from your 1 VIP to your 3 web servers. While there is a tone of toggles and options you can tweak, this should get you up and running.
Failsafe Mechanism.
If you are like me, you’ll clean up environments as and when required. It’s good to see there are failsafe mechanisms that ensure you can’t delete a resource that has a dependency. What’s also great to see is when you delete a Virtual Service, Avi also offer to remove your Pool as well.

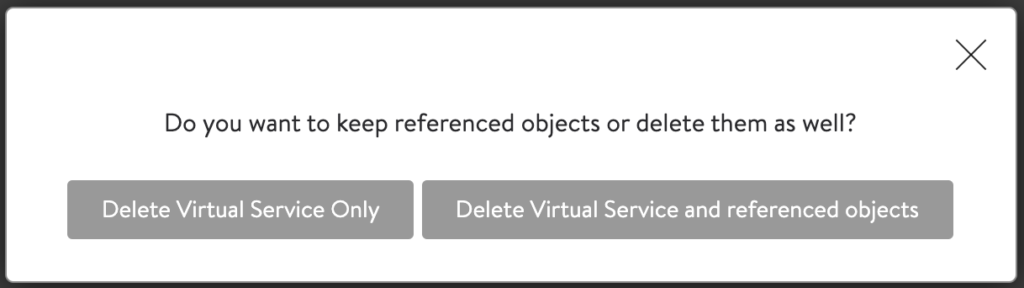
N.B. Deleting all VIP’s and Pools won’t necessarily remove the SE’s.
Closing.
Automation is near and dear to all our hearts. I plan on creating a sub-article with the API calls to create the above.
The setup of Avi Networks can deviate slightly or massively from the above and while you were running through the configuration, you’ll have noticed tones of potential variations. Almost impossible to cover them in 1 blog post, but I’ll do my best to cover different options and features in up and coming blogs. As always, give me a shout on twitter, @UltTransformer, if you want to chat Avi.
Leave a Reply