So I had a customer recently that had deployed a VMConAWS SDDC using a /23 subnet. This is fully supported, but they then ran into scalability issues as that subnet is limited to only allow 27 ESXi hosts. So now they wanted to scale beyond that but were stopped by this configuration limit.
Now you can’t adjust that post-deployment, so this lead to a discussion about standing up a new SDDC and migrating to it or migrating into an existing SDDC that uses /20 subnet.
Now there are 2 supported ways to do that using HCX and I am going to discuss both of them.
I have 2 SDDCs :
TF_TEST and SDDC-Jeff (great names I know!)
Option 1:
Deploy a new SDDC or pick an existing SDDC.
Deploy HCX into both SDDCs if it hasn’t already been done
We now make sure the HCX Cloud Managers have public IPs and this can be configured in the SDDC console:

We then need to make sure the Management Gateway Firewall rules are configured correctly as with VMConAWS its deny by default:


As you can see I have created inbound and outbound rules, which allow me from home to connect to both HCX managers and also for the HCX managers to talk to each other over their public IPs.
Now that is done we can log in to one of the HCX Cloud Managers and create a site pairing as I have done below:

EDIT: Normally you would initiate the site pairing from the source site, this will create the pairing in one direction towards the cloud. As a result, you could extend networks from the source to the destination but not from the destination to the source.
Since in this instance we are pairing two SDDCs and they both have HCX Cloud Managers, we can do a bi-directional pairing. What you do is you do the pairing both ways:
- Log into HCX Manager 1 and pair with HCX manager 2
- Log into HCX Manager 2 and pair with HCX Manager 1
As long as they are both HCX Cloud Managers, it will allow you to do so and then you will see something like this:

Find more info here in the docs
Now that is done we can look at the HCX Network Profiles, with VMConAWS when you deploy HCX you are given two public IPs that are assigned to you and all the firewalling rules are done for you already.

Both HCX Managers have the externalNetwork profile and will have 2 distinct public IPs in them.
You can now create a service mesh that deploys the HCX components that do the heavy lifting. with VMConAWS they have created the Compute Profile for you already, making it all that bit easier!

Once you have created your service mesh you will see the service mesh show all the green dots, which tells you that everything was deployed correctly and the mesh appliances can communicate with each other across their public IPs using their own secure VPN tunnel, as shown below:

As you can see below I migrated a few test VMs without any issues:

Option 2:
This is where we put 2 SDDCs into an SDDC group!

As you can see here I have added both the SDDCs to the VTC-HCX-Test group, this then connects them both to the VMware Transit Connect which is a VMware managed AWS TGW. So the SDDCs have direct links plumbed into it, which are faster/low latency than the public IPs HCX would normally use.
The costing is slightly different as well, as you are charged per connection per hour and data transfer rates as well. There are various blogs and documentation on this already out there.
The key thing is the SDDCs must have distinctly different Management CIDRs to be in an SDDC group!
You will end up with something like this:

As with option 1, you will need to deploy your HCX Managers into the SDDCs, and configure the HCX Cloud Managers to use public IPs and configure the same set of firewall rules.
Now you will log into each HCX Cloud Manager and ignore the externalNetwork profile and focus on the directConnectNetwork1 profile.
One thing to note is even though we use the directConnectNetwork1 profile, there is no requirement to use a Direct Connect/DX at all.
Here we have to input an IP range that is totally unique and not used anywhere else in either SDDCs or on-prem if you have a DX or a VPN routing traffic. An example of which is below:


As you can see here I have used two distinct /29 ranges that are totally unique, one range at each site. There is no need to provide any other info at all, just save and continue!
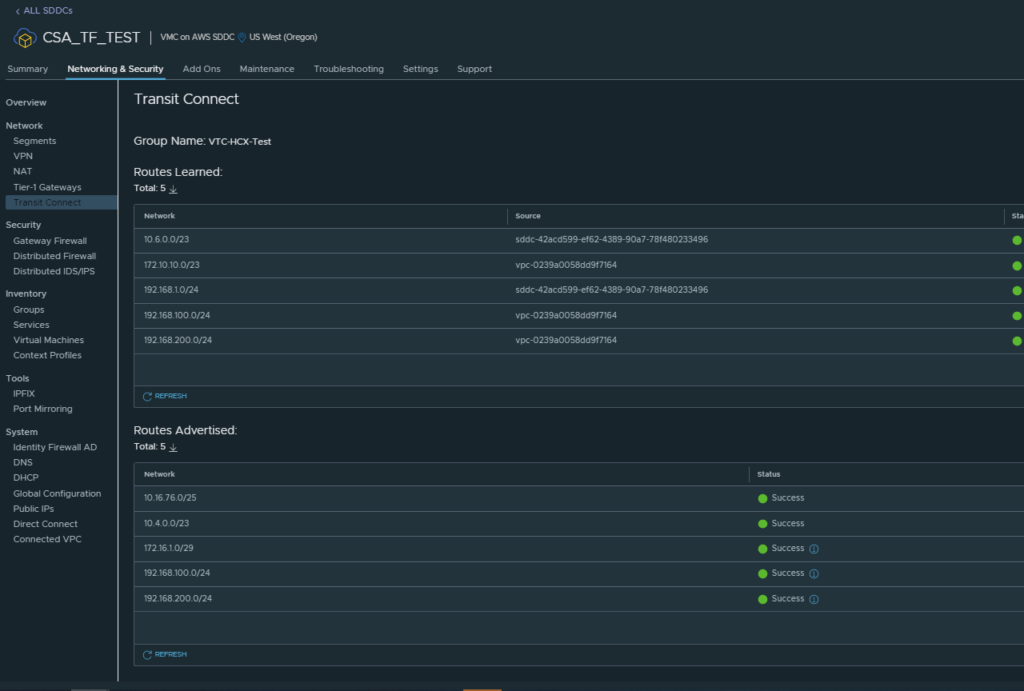
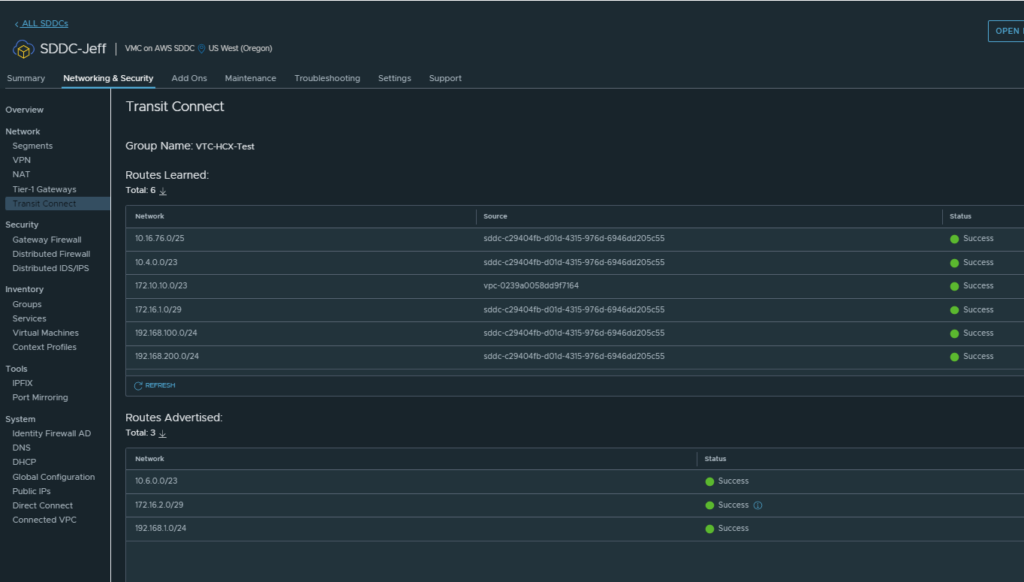
Now let’s have a look at the Transit Connect details for each SDDC:


You can see that once we put those IP ranges into the HCX directConnectNetwork1 profile it automatically starts advertising them out of the vTGW for you.
Now you can deploy your mesh as in option 1 and you will be good to go, as shown below:

Now you are good to extend networks and migrate however you like!

Nice article, thanks Bilal!
Cheers Vern!