There are a couple of things to prepare before you can start setting up your VSAN 6.6.1 test on Ravello Cloud. If you don’t have an account, you can click on the picture below which will redirect you to the Oracle cloud signup page (Ravello is owned by Oracle). After signing up you will receive 30 days of free access and a budget of 300$ to spend as you wish.
Images
For this VSAN 6.6.1 test, I have uploaded the following files to Ravello:
- Server 2012 STD iso file
- VMware-VIM-all-6.5.0-6816762.iso
- VMware-VMvisor-Installer-6.5.0.update01-5969303.x86_64.iso
Create a new application in Ravello
In this application you will create all the VM’s you need for this test.
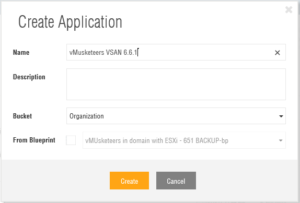
Click on create application give it a name and click Create
Networks
Prior to setting up VSAN or any of the VM’s, I have created the following Networks in Ravello:
- 10.1.0.0/16
- The hosts will be serviced using 10.1.0.0 (10.1.0.1 – 10.1.0.254)
- The VSAN network will be serviced using 10.1.1.0 (10.1.1.1 – 10.1.1.254)
- The VMs network will be serviced using 10.1.2.0 (10.1.2.1 – 10.1.2.254)
- The directory server will run from the default Ravello network: 10.0.0.0 (10.0.0.1 – 10.0.0.254)
To create a new network in your new application you have to do the following: In the new application click on Network.
Then click on Switches in the left side of the menu and click on Create Switch.
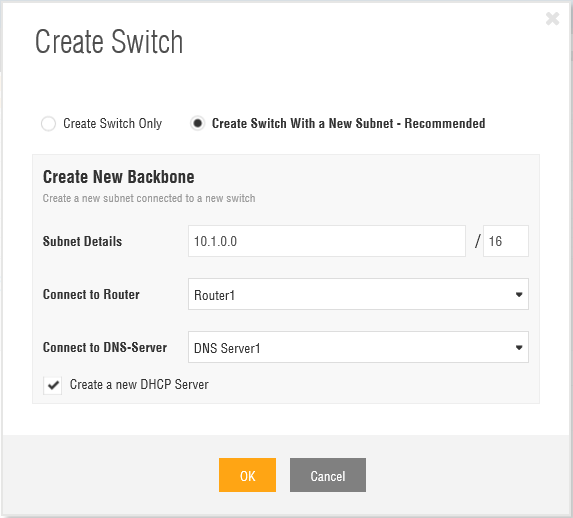
In the new menu, fill in the network you want to create.
Important: the easiest way to create a new network which can be routed to and can be reached is to follow the recommendations. Create Switch With a New Subnet – Recommended. Keep the default Router and DNS server and select to Create a New DHCP Server.
When you click on OK the following will be created for you:
- A new Switch called Switch1
- A new Subnet 10.1.0.0/16
- A new DHCP server with the IP 10.1.0 1 (range: 10.1.255.1 – 10.1.255.254)
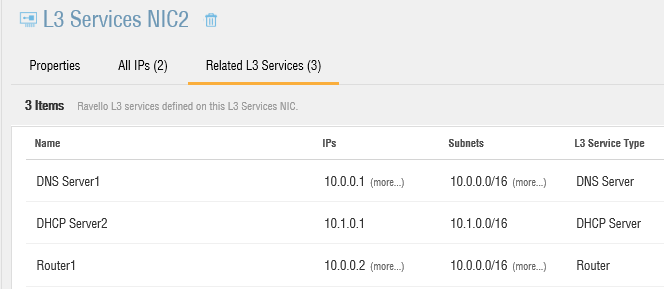
- A new L3 Services NIC (L3 Services NIC2) with the IP 10.1.0.1 (This NIC will give access to the new DHCP server (DHCP Server2) but also to the DNS services of the already existing DNS server (DNS Server1)
Create VM’s
1. Directory Server
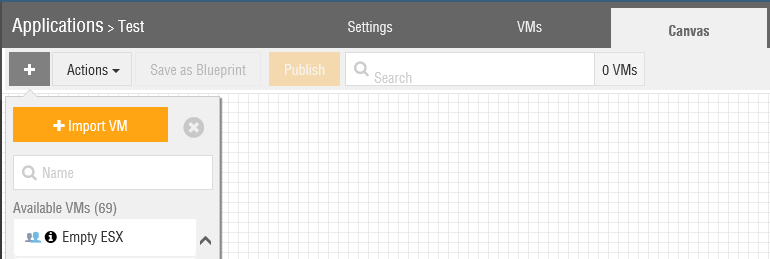
The first VM to create is the Directory Server. I am putting this server on the pre-existing network 10.0.0.0/16. Open the Canvas, click no the + and drag Empty on the canvas.
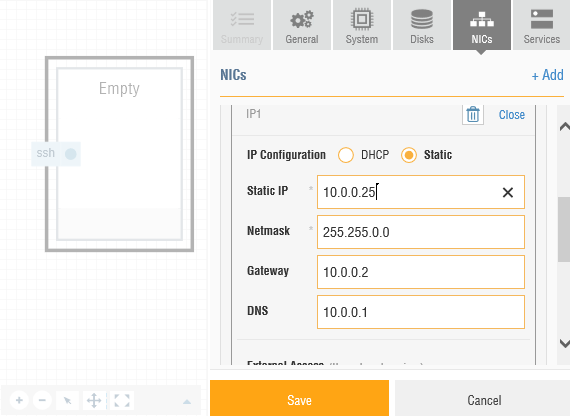
I will show how to set the network settings for this VM manually. All other settings are being made in an identical way.
Set the configuration of the VM, Save
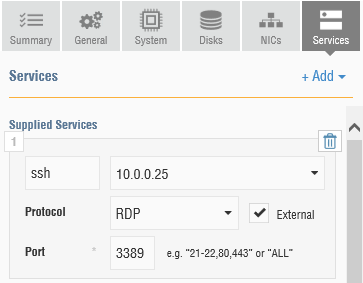
Add the RDP Services to the NIC so you can RDP into your new VM. Once your VM’s have been added to your new domain, RDP access will be easier.
Click Publish in the top of the page.
2. vCenter Server
vCenter server has been setup on a Windows server as well. Shame on me for not using the VCSA, but on Ravello, a Windows server still is easier to setup.
3. ESXi servers
To create ESXi servers you will have to drag the Empty ESX on the Canvas. For the most part follow the same procedure you have followed to create the Directory servers. There are a couple of differences though.
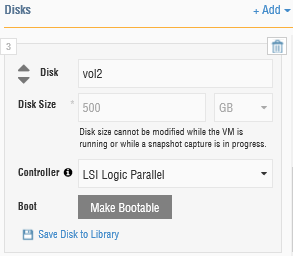
Add multiple disks to the ESXi server
I have added all disks as LSI Logical Parallel
- 20GB – ESXI disk1
- 500 GB Data Disk1
- 500 GB Data Disk2
- 50 GB Cache Disk1
You can add more disks if you want to and in different sizes if you so wish to.
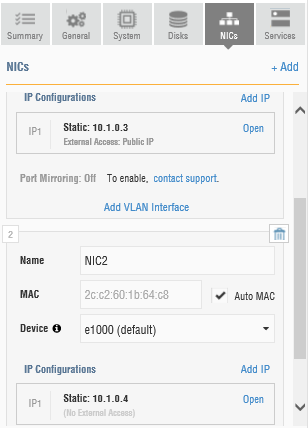
Add at least 2 network adaptors to the ESXi server
I have added both to 10.1.0.0/16
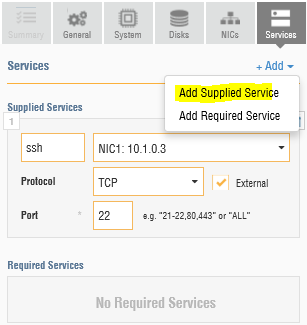
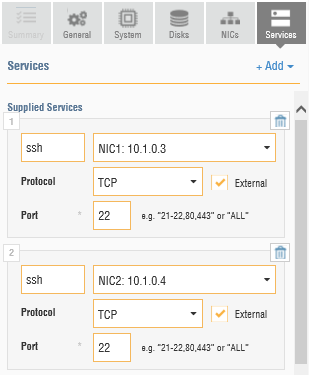
Add the SSH service to the adaptors. For the secondary adaptor you have to Add a Supplied Service and make the modifications manually.
Setting up vCenter and VSAN
- Add the hosts to vCenter server
- Create a Distributed Virtual Switch and create the Portgroups you need.
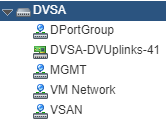
- Add the hosts to the DVS ( Currently they only have a MGMT vmk and a single uplink. This is fine for now.
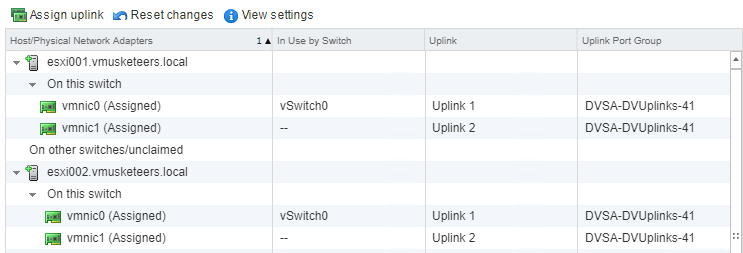
Assign all uplinks to the DVS, even the ones not in use.
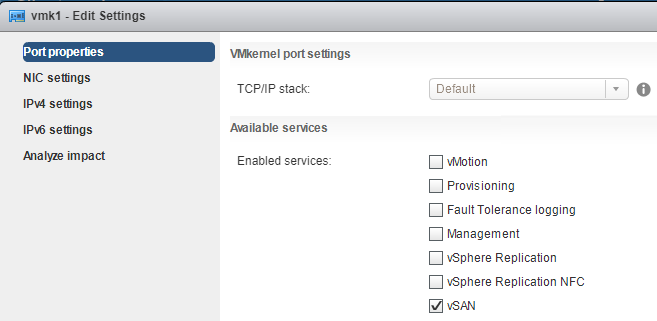
Then create the new VMK for the VSAN network on all the hosts. Make sure to check the VSAN service in the port properties.
Storage
On all the hosts go to the storage devices and mark all devices you will use for VSAN as FLASH disks.
Enable VSAN on your Cluster
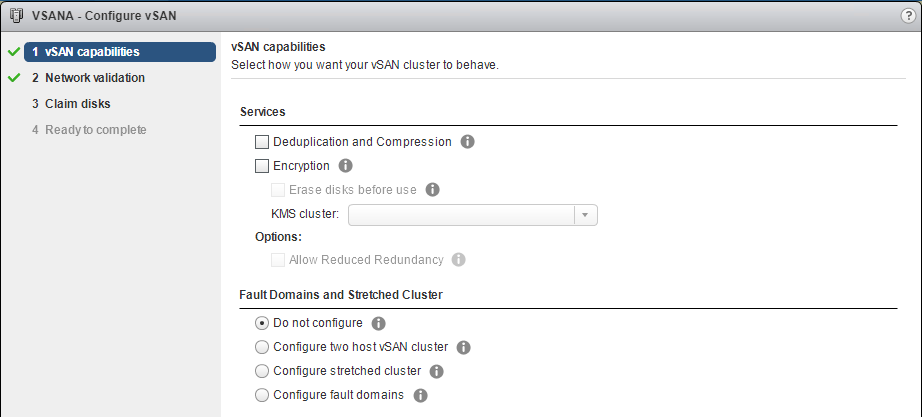
Once you have done all that, you can enable VSAN on your Cluster.
Personally I choose not to enable deduplication and compression as this runs in the Oracle (Ravello) cloud. I still might d this at a later stage.
Neither have I enabled encryption as I do not have a KMS server in this test environment ( I might add it later)
Kim









Leave a Reply