

So now we have deployed and configured VCDR, now we can go into all the bits that allow you to protect your VMs and failover!
Protection Groups
So now we can get into the nitty-gritty of starting to create Protection Groups and Recovery Plans. This is the meat of it all, where you define what is going to be protected and how it should be recovered.
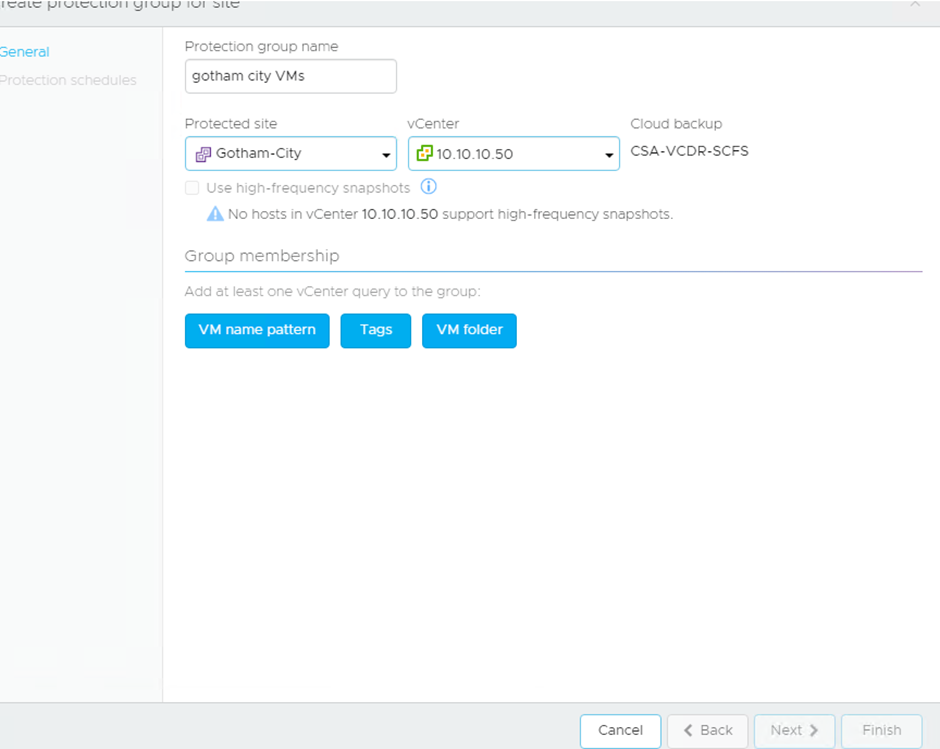
As you can see you can define how VMs are added to the protection group by using Naming Patterns, Tags or VM Folders.
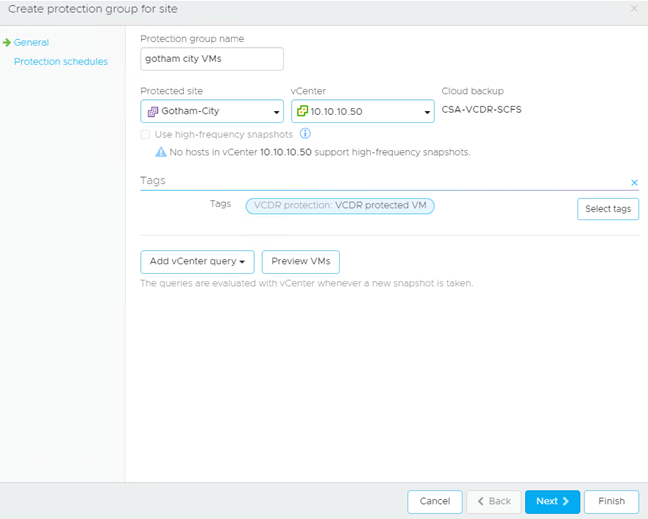
In this example I have used vSphere Tags:
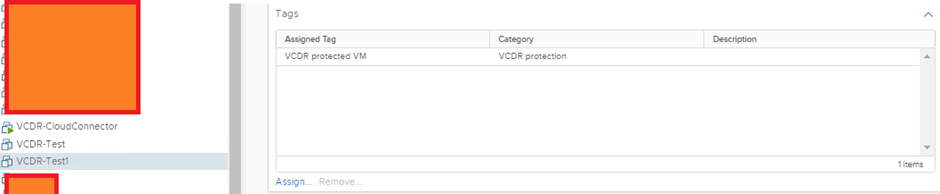
In my vCenter you can see I have created a tag specifically for VCDR to use:
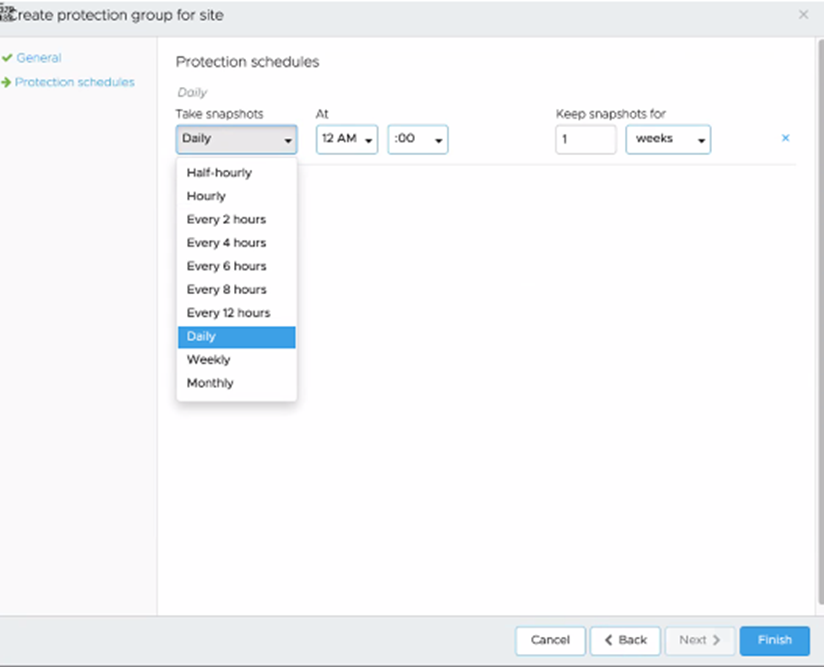
Then we can look at the various schedules:
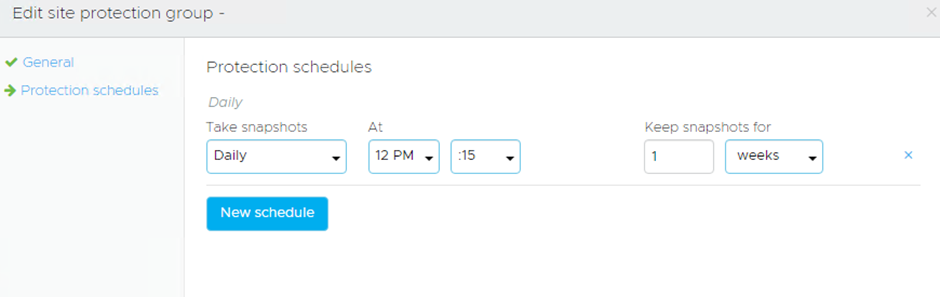
By default, the lowest RPO you can have is 4 hours, then its 6, 8, 12, daily, weekly, monthly
For retention periods you have hours, days, weeks, months, years
Now if you have vSphere 7.0u2c+ at the source you can use the High-Frequency Snapshot Feature which gets you down to 30mins RPO.
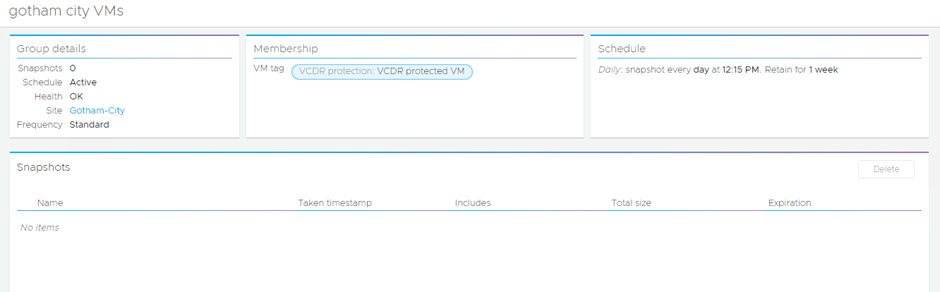
Once that has been created it will be listed under Protection Groups:

Regardless of what way you go about grouping VMs into protection groups, as long as they meet the criteria they will be added automatically, every time a snapshot is taken, as it queries the vCenter inventory each time.
Now it will show as empty, normally I would expect to see the VMs listed or something like that, but nope. Until it takes a snapshot you won’t know what’s protected:
After the schedule snapshot has been taken:
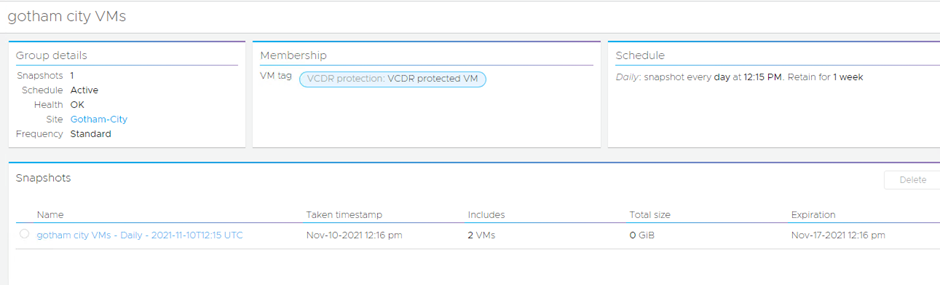
It is just a normal snapshot with vCenter as seen in the VM tasks/events:


You can take additional snapshots on demand if you like and define their retention period:

This is quite handy if you know you have some big changes coming along and you want to give yourself that extra safety net.
Recovery Plans
Just like with SRM once you have configured your Protection Groups, you must create your Recovery Plans. A Recovery Plan uses the protection groups and recovers them as you see fit.
Some customers have one master recovery plan, that recovers everything, and then it has more precise recovery plans to keep things more controlled.
For example, you could have a recovery plan for Test and another one for Prod and then have a third plan that recovered both, all depending on your requirements.
Recovery Plans are where resource mappings are configured. This is where you tell VCDR, where VMs in Cluster A should end up in VMConAWS Cluster B, same for datastores, networks, folders etc.
One key thing to note is you CAN’T have a many to one style of mapping. So, for example, you can’t have 2 source clusters mapped to one single SDDC cluster. The way around this is that I have used is to have multiple resource pools as shown below:
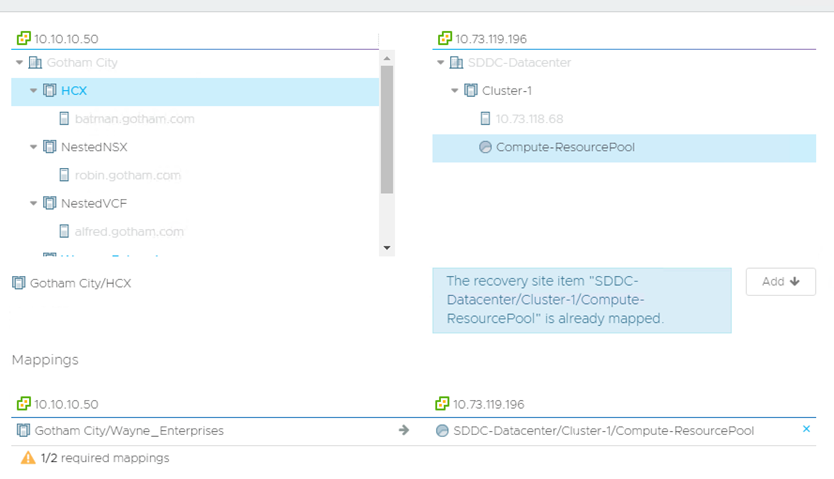
As you can see my HCX cluster can’t be mapped to the Compute-ResourcePool because it has already been mapped for another source cluster. So, to get around this:
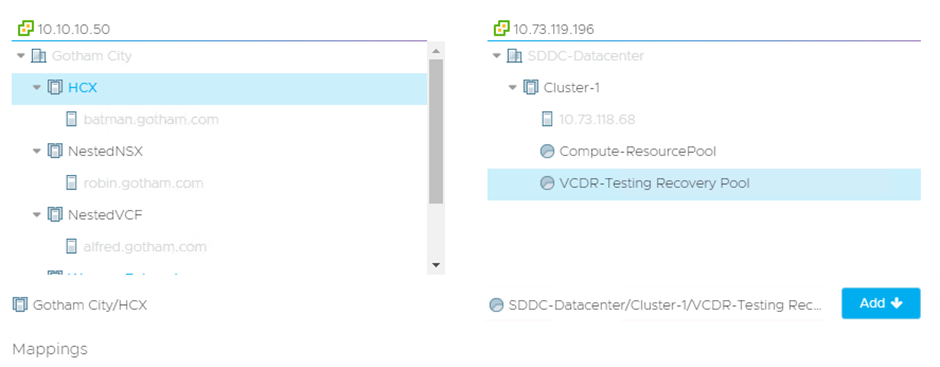
I created a VCDR-Testing Recovery Pool and used that for the HCX Cluster.
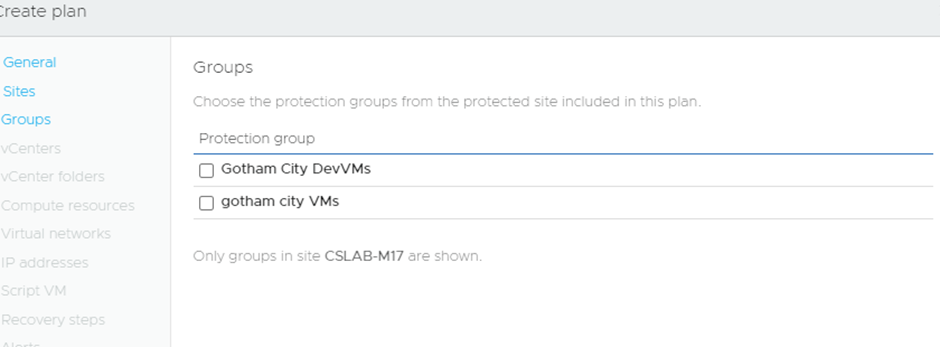
In this example, I have 2 Protection Groups and I am configuring a new Recovery Plan to encompass both:
For this Recovery Plan, I can do a totally different set of resource mapping as well, giving me a vast amount of flexibility.
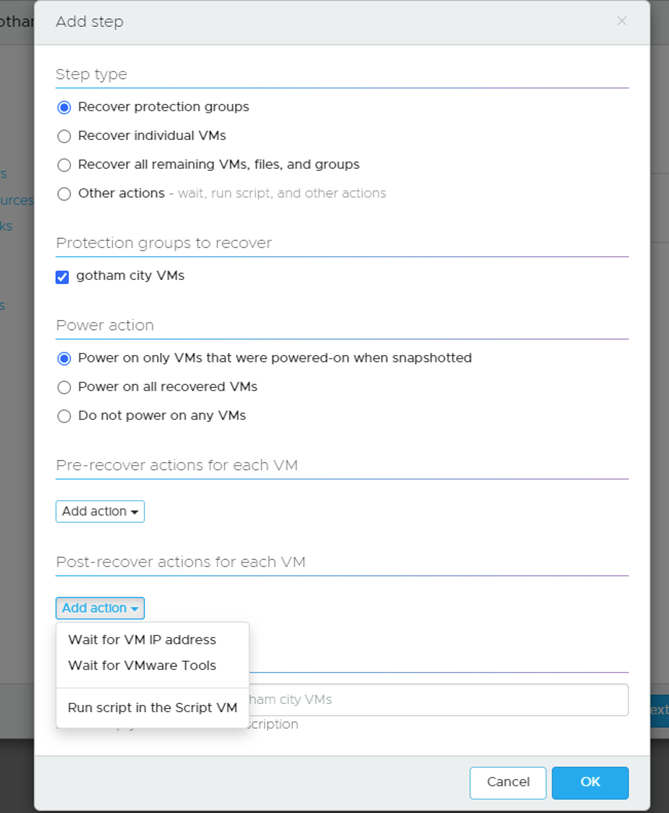
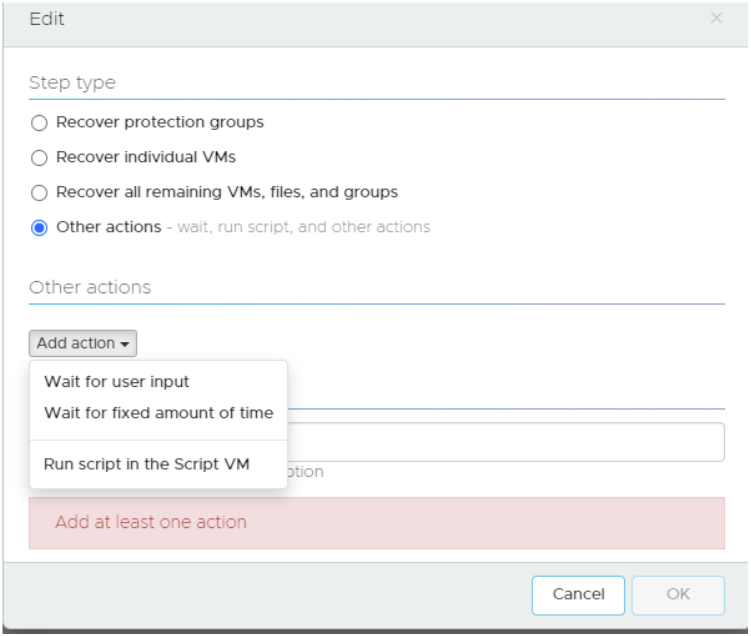
Since this is for Dev VMs, I have made the choice to recover them all but NOT to power them on:

There are various other options available:

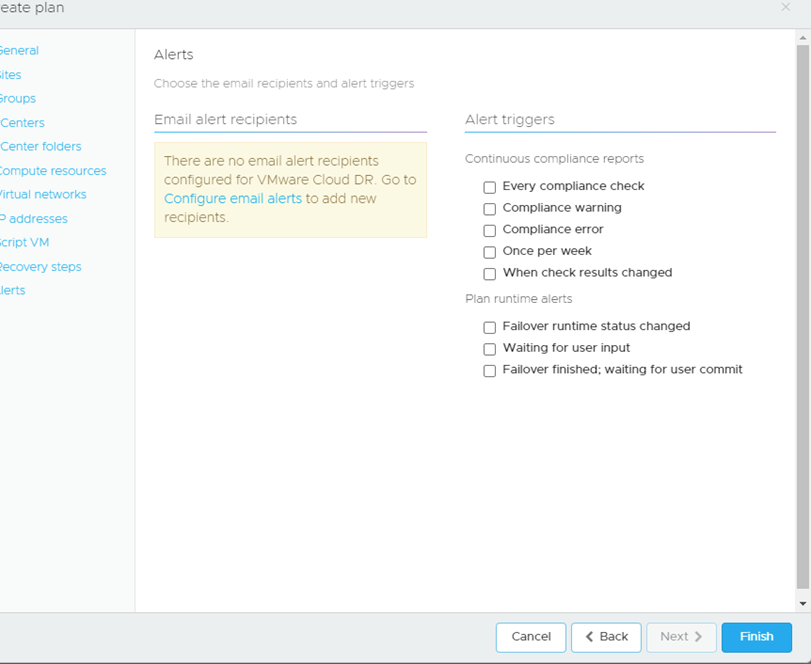
I can even set email alerts for this plan:
Continuous Compliance
If you’ve used SRM before you will know all about the compliance reports, you can pull to show the business and auditors that you are doing regular tests and that everything is configured correctly.
VCDR allows for these but also checks your Recovery Plans for configuration compliance to make sure everything is correct, and it does this every 30 mins, and you can force sync it as well.
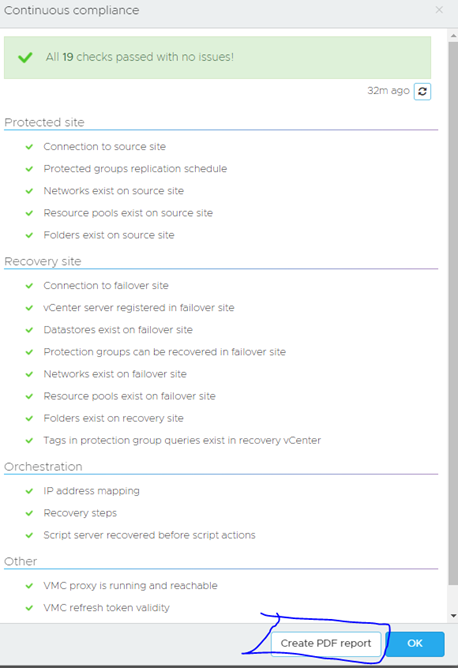
I have a continuous compliance report below that is showing an error:
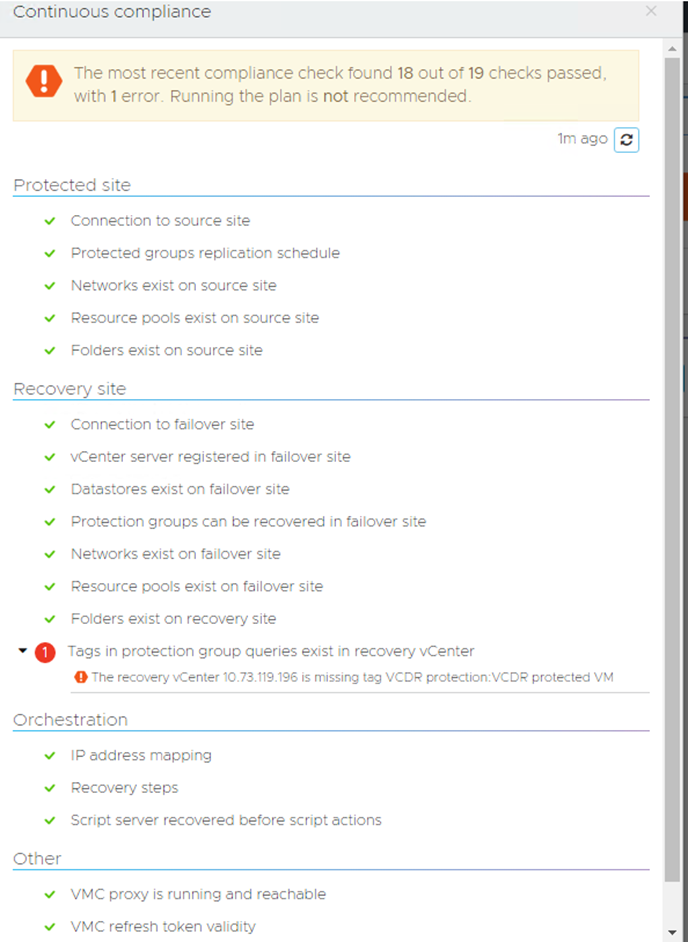
When you create a Protection Group that relies on vSphere tags, one of the key things you must remember is that whatever tags are being used, you must create them manually yourself at the destination. If you don’t do this, you will have issues and it warns you as such.
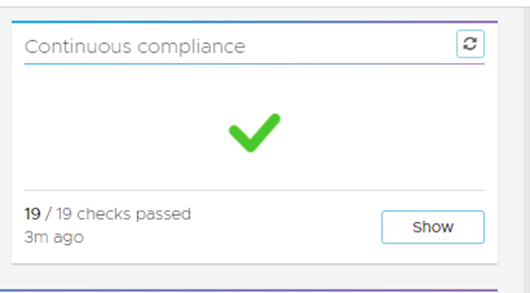
So, after I created the Tags in the SDDC, I could either wait 30 mins for it to run again or force the check manually and it passed:
You can also download a compliance report for audit purposes:
So now that is all done, we can now actually run a test!
Click inside the DR plan and you will be presented with these options:
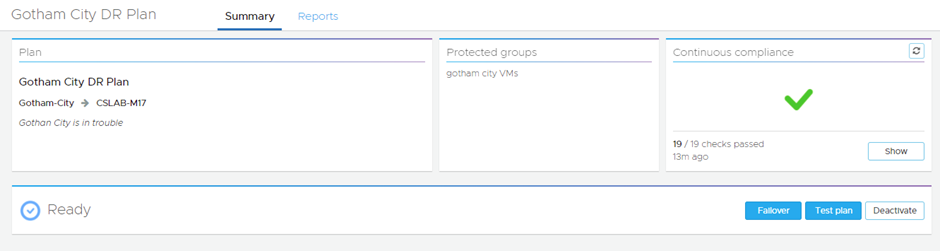
Test Plan
This does exactly as you might expect, it recovers the VMs are per your Recovery Plan and brings them up but not attached to any network. So you can test for compliance and if things don’t go to plan, you can clean up and try again.
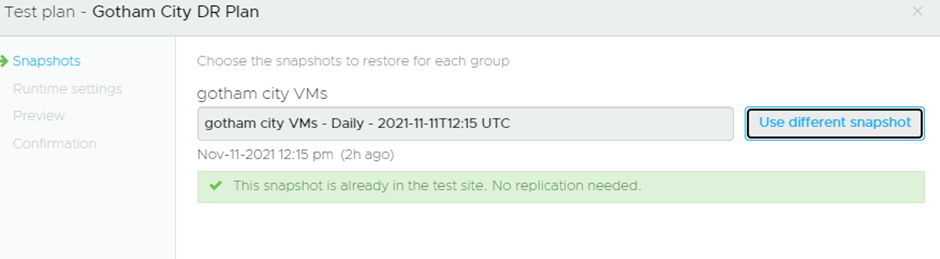
You can select what snapshot you want to use, so if you have a requirement to use a specific time and day of snapshot you are covered:
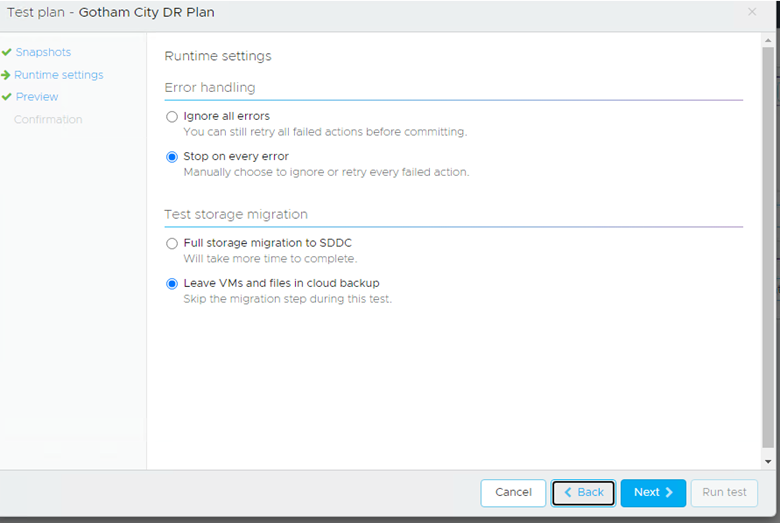
You can then decide how it handles errors and whether the VMs should remain on the CFS or be moved over to the SDDC VSAN datastore:
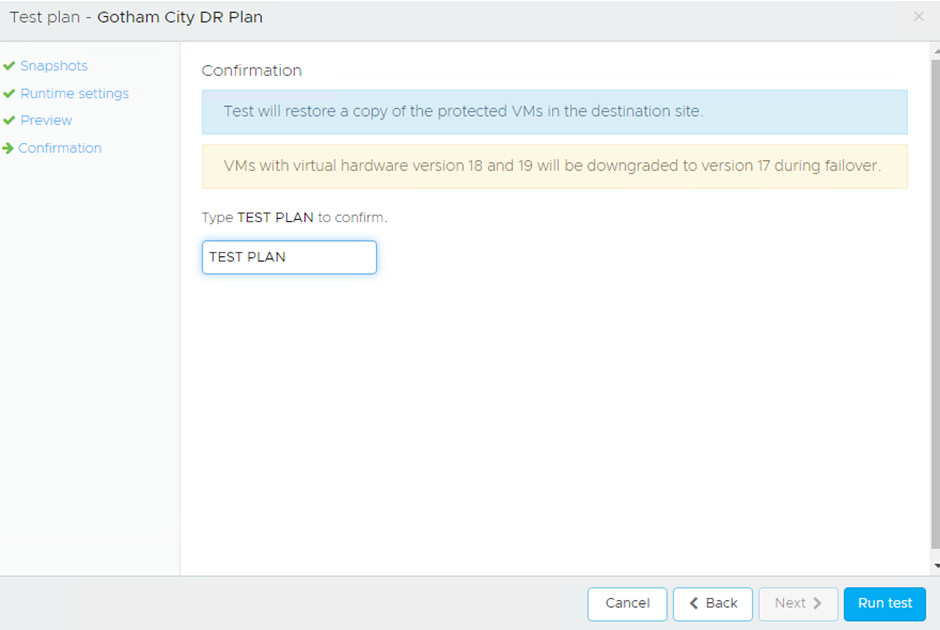
You then confirm you want to run the test and away it goes:
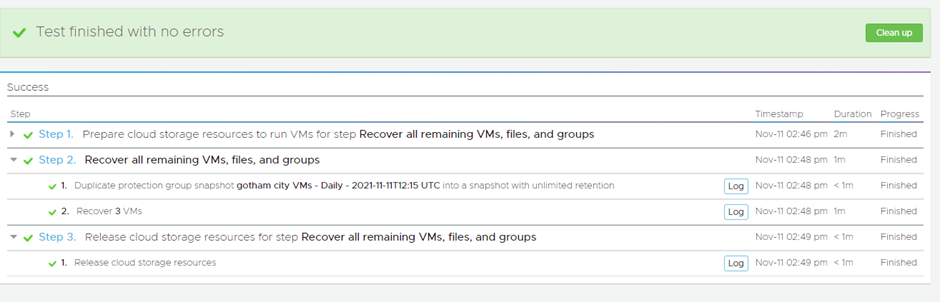
Once the test has been completed you are presented with:
Now when we look in the SDDC we see the VMs have been recovered:
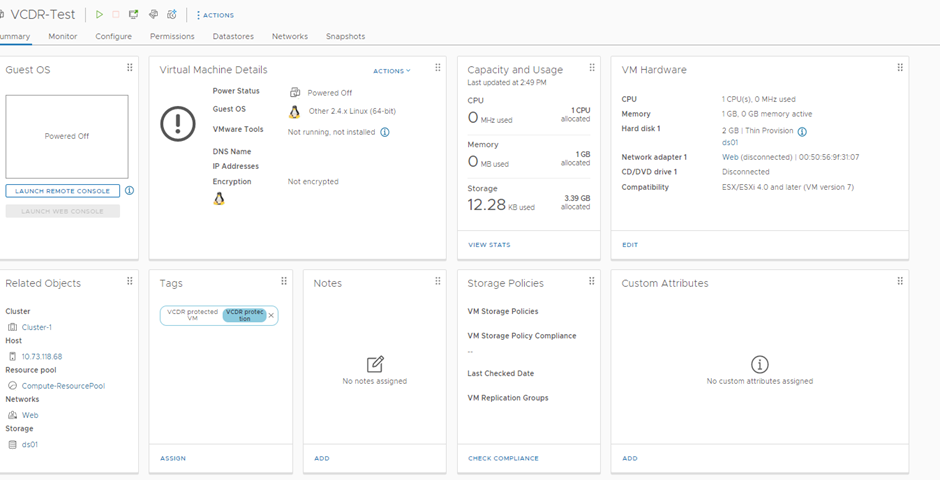
As we can see it got the required tag, it is configured in the correct network, but it is NOT connected to it. My Recovery Plan stated that if the source VM was powered off, in a DR event then VM would be recovered and not powered on as well.
I did a test where I did not have the tags created in the SDDC to see what it did, and it recovered the VM the same but obviously, no tags were configured for it.
Once you are happy with your test, you can then clear it down and that’s done with a few clicks:
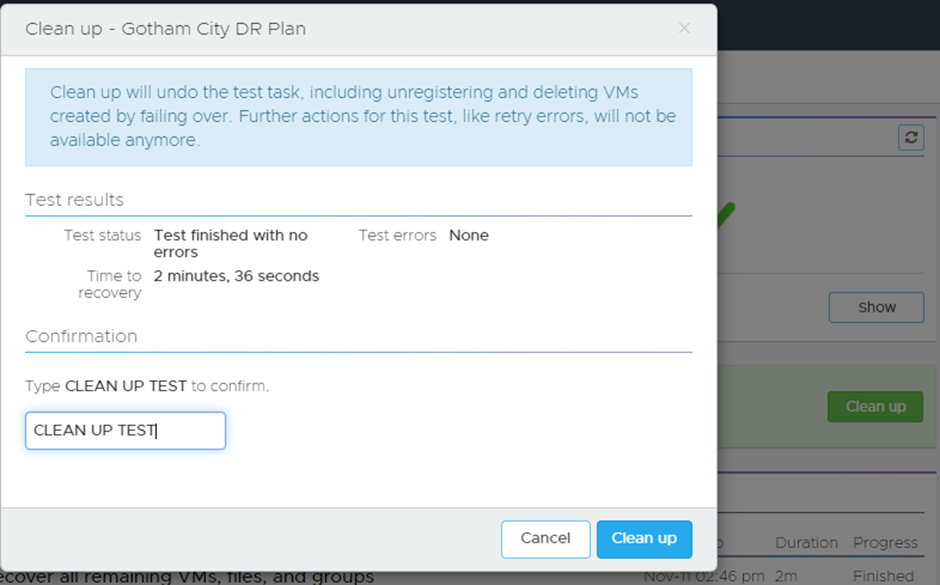
It will then remove the VMs and go back to a ready state
Failover
Failover is very much the same process:
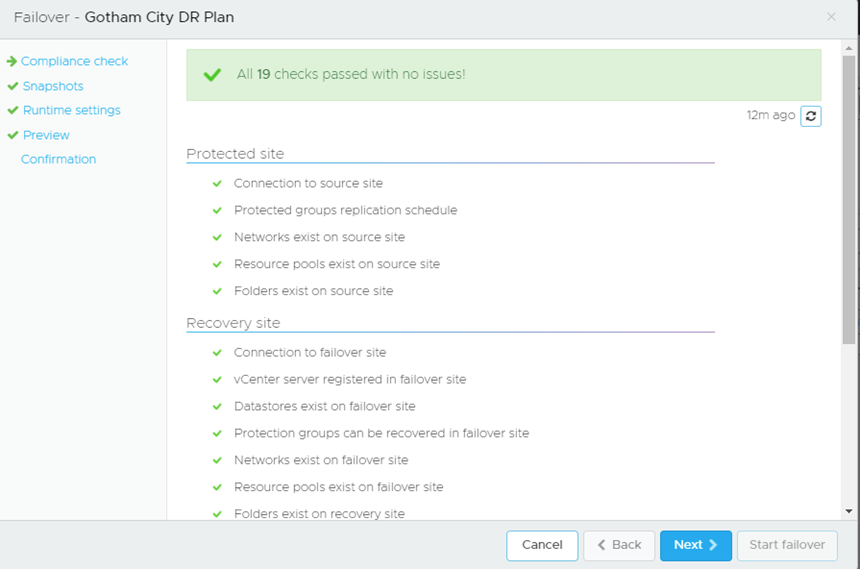
It confirms the compliance checks:
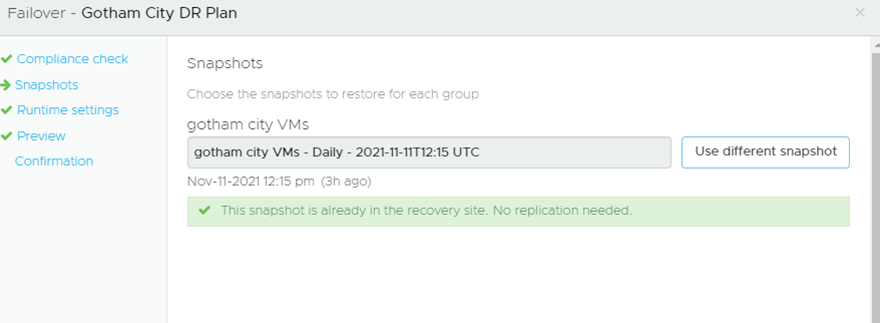
It confirms the snapshot is valid and no further replication is needed:
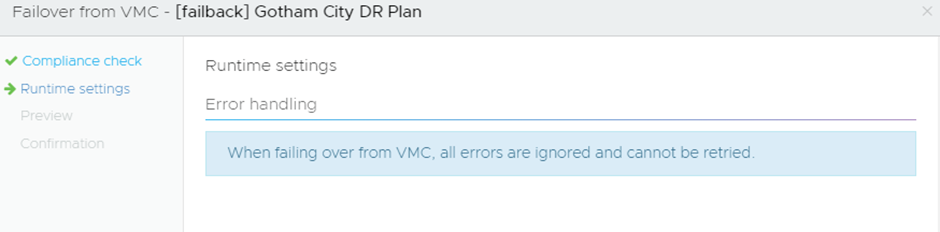
How it should handle any errors:
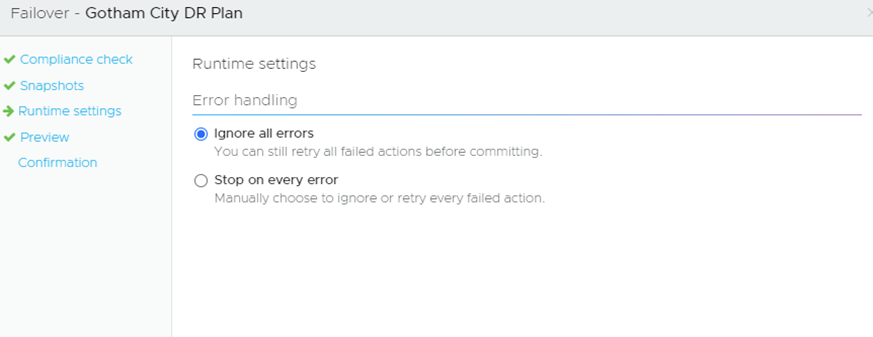
In a DR event, you would most likely just ignore errors of any kind as you just want to get up and running asap.
Then you confirm that you want to Failover:
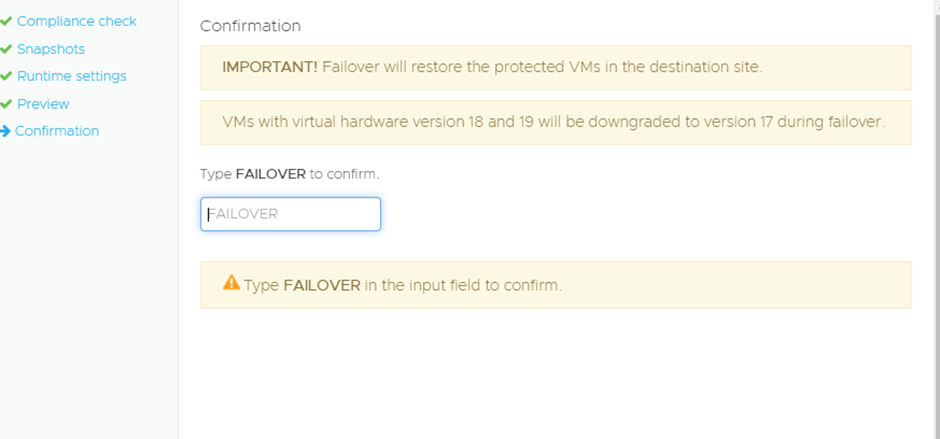
What is interesting is that it will downgrade the hardware level of v18/19 VMs down to v17, in normal circumstances downgrading VM hardware levels has been unsupported.
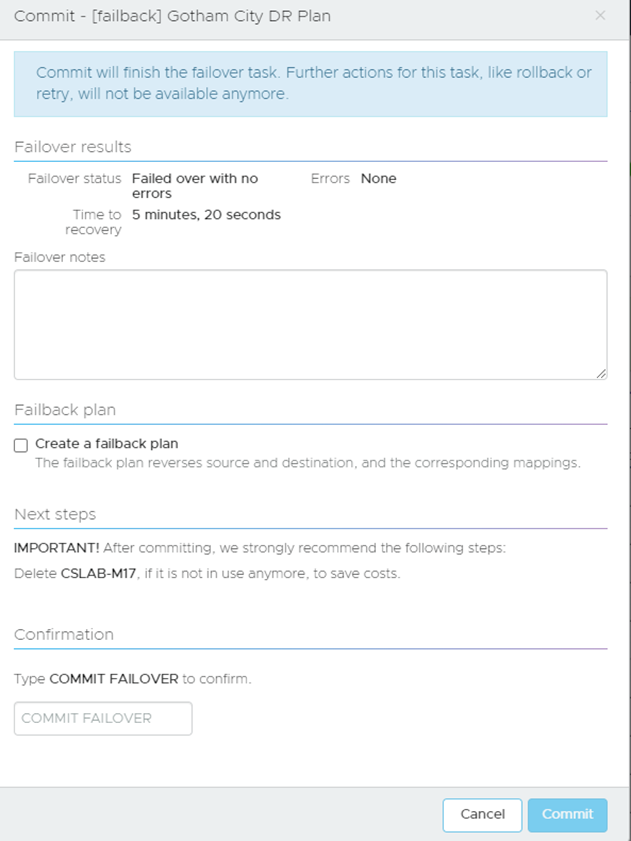
Once it’s done you have the final choice to Commit or Rollback, which is a nice feature:
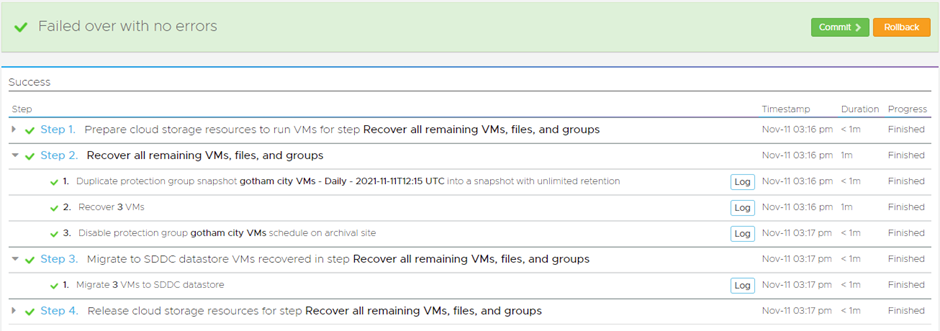
Now one thing to keep note of, it assumes the Protected Site is dead, so if VMs are on etc, you need to turn them off yourself etc.
When you select Commit you are given the option to create a failback plan:
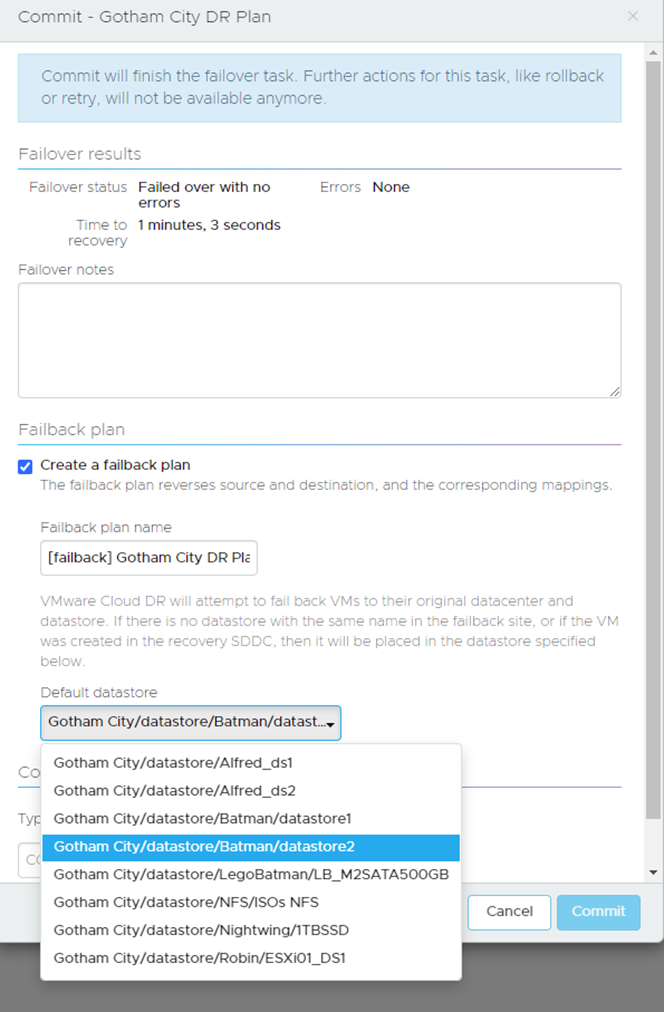
If the VMs have come from different datastores, it will try and map them but if it can’t you can select a general datastore that will cover any straggler VMs.
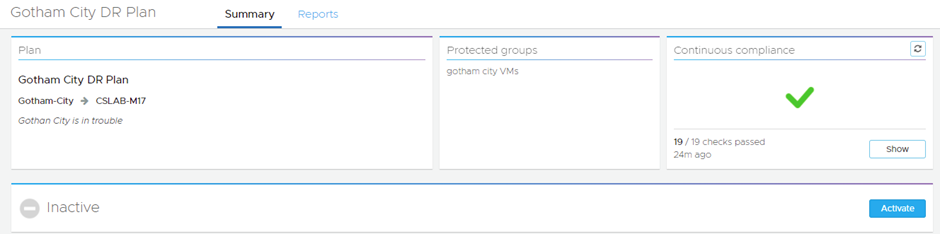
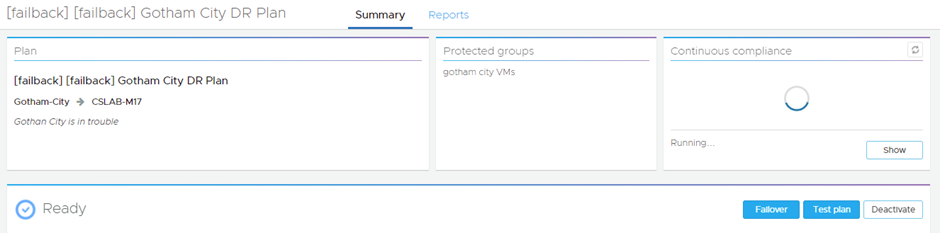
The DR Plan you used to failover will be put into a deactivated state:
Then we activate the Failback DR Plan:
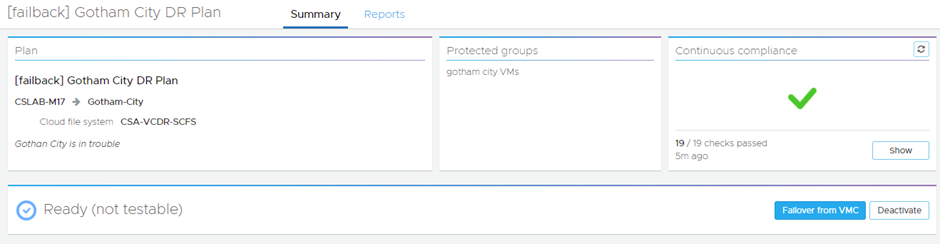
Interestingly the failback plan is not testable.
When you failover:
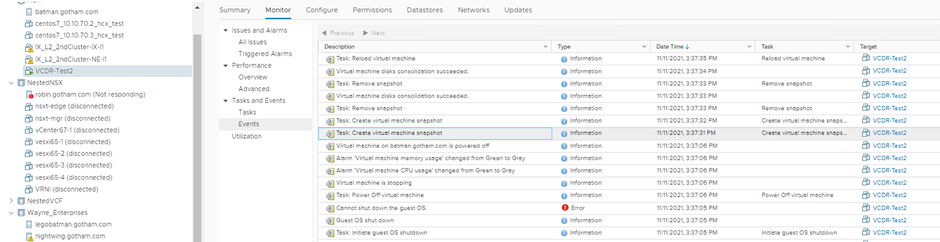
So out of interest I left one of my VMs powered on at the source as I wanted to see how it would handle this scenario:
What VCDR does it failback the VM if it’s powered on it will force power it off, and reconfigure it and then power it back on with the recovered data:
Also when you failback from VMC to On-Prem the VMConAWS copy of the VMs are deleted and not left behind, which is the opposite of when you failover from On-Prem to VMConAWS.
Once it is done you can commit, and this time there is no rollback option:
You can create a failback plan again, so a failback of your failback, but in my experience customers in this scenario will probably want to take stock of everything and start fresh.
If you do create a failback of your failback Plan, you can test it and everything like you normally would for an On-Prem to Cloud DR plan:
Leave a Reply