
This post is a follow-up on the following posts:
Desired State Configuration and VMware Orchestrator
Creating servers and keeping basic configuration consistent and compliant.
There is still some work to be done on this workflow, but it gives you a nice idea what is possible and yes the workflow works perfectly!

To keep this post from getting very long I will assume you know how to install vRealize Orchestrator. If you do not, I will create a post later about how to install and configure vRealize Orchestrator.
In my own environment I have chosen not to use the embedded vRealize Orchestrator that comes with vCenter but to use the appliance. This prevents resource contention and in the case of complete server failure of either vCenter or vRealize Orchestrator, I will not have to go through the whole setup and configuration process of both.
THE WORKFLOW
At the top of the page I am sharing a server creation workflow. Below you will find all relevant screenshots. These will give you an idea where and how to change the, attributes, input parameters and such.
But what does this workflow do?
1. Logs who requested the server.
2. Logs who created the server.
3. You select the standard template to be used with this workflow.
4. You select the folder you want to create the server in.
5. You select the network the server will be using. There is no need to change network settings in your template before server creation or to have a template for each network. Orchestrator takes care of this. 6. You select the gateway the server will use. There is no need to change network settings in your template before server creation or to have a template for each network. Orchestrator takes care of this.
7. You will add the server to the domain.
8. You will select the number of vCPUs.
9. You will select the amount of RAM.
10. You will define the storage to be used by using a script which will select only those datastores which match the naming convention.GetAction(“com.vmware.library.vc.datastore”,”getAllDatastoresMatchingRegexp”).call( “FistCharactersOfYourSelectedDatastores*” )
11. You can send out an email once the server has been created. As you can see the Workflow to send out emails has been nested into this workflow. You can make sending an email optional by adding a Decision. Or by creating a second workflow which will use a new presentation pane and adding this workflow to this one. This will have the benefit that the Presentation for the email will not show up if you chose to not send out email notifications after the workflow completes.
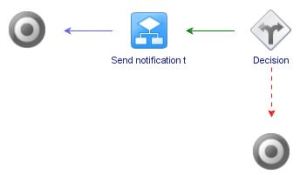
The workflow scheme

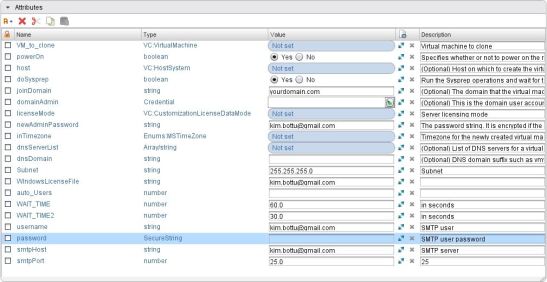
The Attributes
You can edit attributes right here.
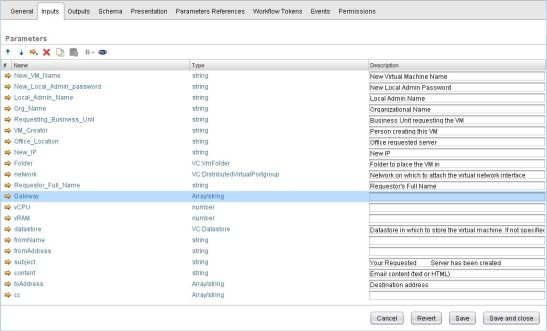
The Parameters
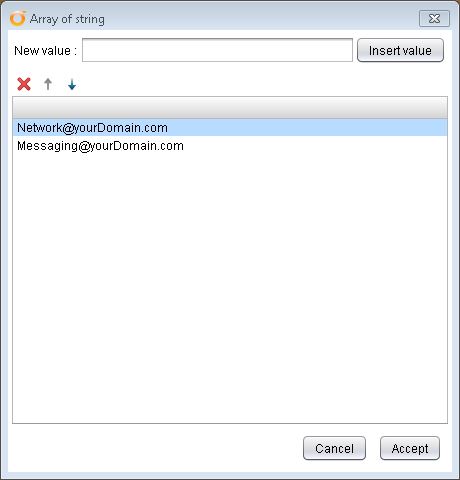
An Array/string allows you to enter multiple predefined answers. But changes should be made from the Presentation tab!
The Presentation Layer
All items in use in the presentation layer should be modified as displayed in the screenshots below.
An Array/string allows you to enter multiple predefined answers.
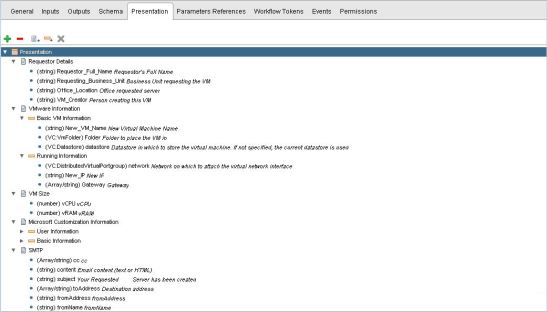
The Presentation Layer – Properties of Input Parameters.

Changing Array/String values.
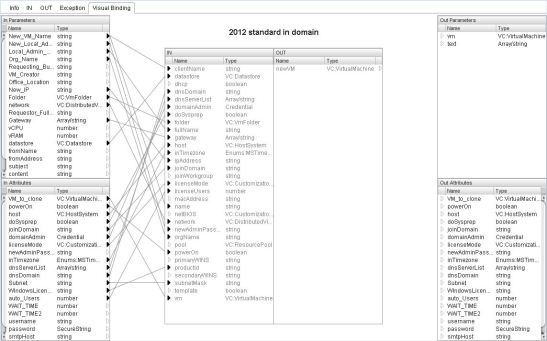
Visual Binding – Server creation
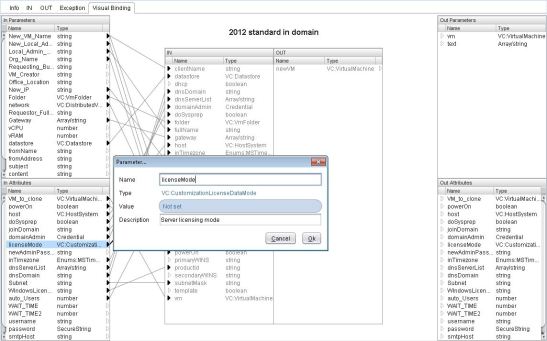
Visual Binding – Server Creation , Editing
Yes, you can edit or enter some values from here as well.
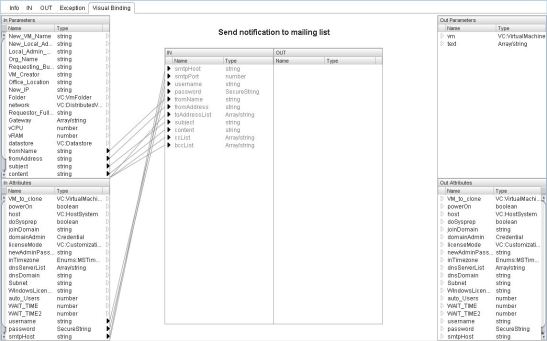
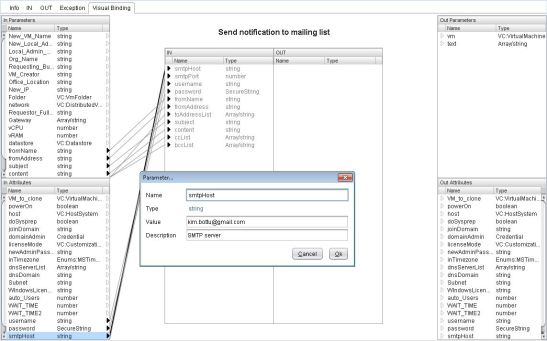
Visual Binding – Email notification
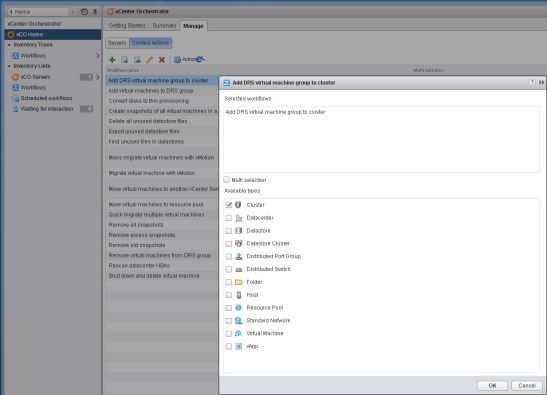
Executing Workflows can be done from the Orchestrator full client, which you need to create workflows, but also from the vSphere webclient.

In case you wonder how to run standard workflows from the webclient to for example cleanup snaps, you have to activate the workflows from this pane.
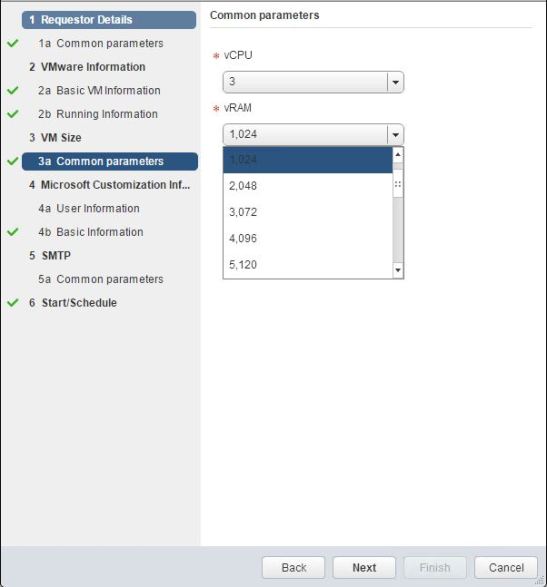
Running the workflow from the vSphere WebClient example screenshots:
Setting vCPUs and RAM
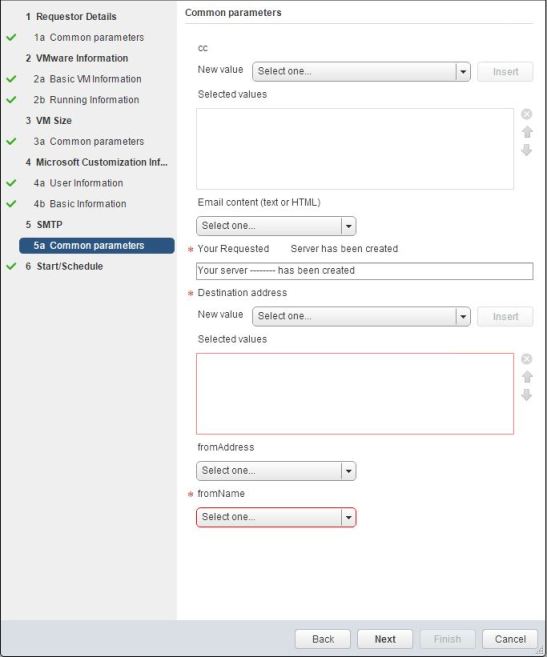
Sending Email options

Leave a Reply