Scenario faced –
My customer has a web server that’s currently hosted in a datacentre. They want to bring this web server in house and use their vSphere platform to host it as a VM, saving around £1000 per month.
I have to mention that this is a single web server with no load balancing, it’s an online ordering site that doesn’t experience a high amount of traffic (it’s basically a wholesale ordering site, only certain customers are allowed to buy through it).
The server I need to virtualise is in a datacentre, how can I import that into the vSphere environment? There will definitely be downtime, there’s no escaping that. The DC is miles away from the new building where the VM will live, and the only way to virtualise it will be to sync this VM onto an external hard drive and drive that hard drive to the site. We could of course connect the two sites with a VPN, and set our target as the vSphere environment, but that could be complicated as we’d need to connect our management VLAN to the hosting company’s network and would involve work from their end.
In preparation, I’ve created a new DMZ on the customer’s network and ensured that the VLAN is added to the vSphere environment in the form of a new VM network. The web server will need to communicate with the SQL server, as well as users so those lines of communication are open. Everything else from the DMZ to the customer network is blocked.
Time to P2V.
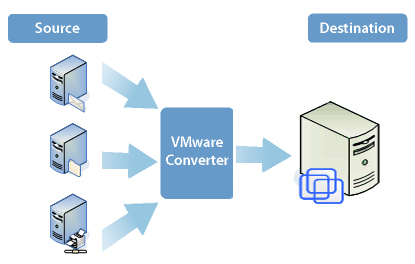
We’ll be using the best P2V tool out there – vCenter Standalone Converter. Since our target is an external HDD, we can only do a single sync, followed by a final optional sync.
Download, install and open the tool:

Click on “Convert machine” at the top left to get the following screen:

Select source type: “Powered-on machine” as we’re doing a hot clone, however you can clone pretty much any other type of server whether it’s physical or virtual regardless of platform or OS.
“This local machine” is what we’re selecting here, however we can run this tool from a remote server provided it has access to both the source and the target. Since the target is connected directly to this server, we’ll run it from here.
Note you will need full administrator access to the server, either a local account or, if domain-joined, a domain admin account.
The destination type will be “VMware Workstation or other VMware virtual machine”
The VMware product will be “VMware Workstation 11.0x” however you can use 10.0x as well.
The location for the VM will be the external hard drive, make sure the folder is created. The name is what will appear in vSphere after the machine is added, but it can be changed at any time so don’t worry too much about that.

The next window you’ll see is the settings of our target VM:

This will mirror exactly what the physical machine has, but you can tweak it as necessary. The part that I find the most important is the Advanced options:

Since I’m starting the conversion while the machine is powered on and services are running, I want to select “Synchronize changes” after the clone is complete.
You get a summary on the next page:

In most cases, you can leave everything else at defaults.
Click finish, the job then starts:

Note, the time estimated really isn’t that accurate (not in my experience anyway).
It means I will have to keep an eye on it and stop the services as the clone is coming to an end. This is only to ensure that there are no corrupted or missing transactions.
At this point, you’ll have a few files in the folder you specified:

The .vmx file is the file that will be imported into Workstation, and the .vmdk is the file that contains the contents of the disk that we cloned.

I gave the task plenty of time to complete, and narrowly avoided missing my deadline of 12am. The hosting company will be removing the external HDD promptly at this time! You can see my start time there of 8.15pm.
Next, I copy the VM files off the external HDD and onto my laptop:

Once the files are copied, I open the VM from VMware WorkStation 11:

Once added, I then export the VM to OVF by selecting File, Export to OVF:

Once the export is complete, I can connect to the vCenter and deploy my newly created OVF template:

You can change settings before deploying, and power it up automatically once complete. This shouldn’t take long.
Once the VM is there, power it up and carry on as if it was a normal P2V. This includes installing VMware Tools, removing physical hardware drivers and reactivating Windows if necessary. Reassign IP addresses and you’re good to go!
My customer has just brought their hosted web server in-house and saved themselves nearly £1000 a month in hosting fees. The VM is protected by vSphere HA and Veeam – what more could you want?

Leave a Reply