

Intro
As a vEXPERT I am entitled to a cloud lab provided for by Ravello Systems. By default this lab has been setup on a specific network:
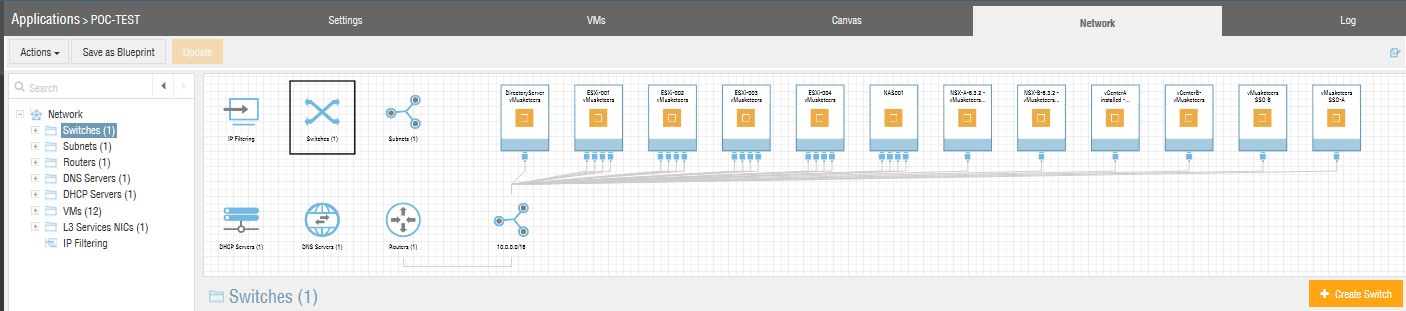
10.0.0.0/16. Until today I have been placing all my objects on my canvas on that same network. Below you can see an example of that.
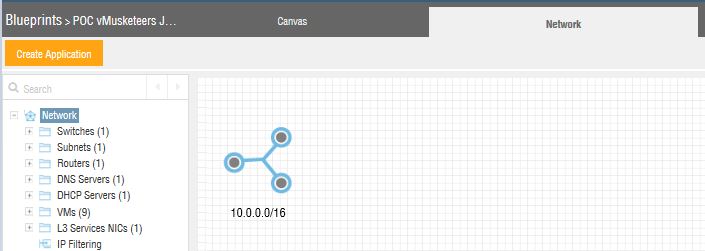
When I take a deeper look in the network configuration of Ravello I can see that the following has been pre-configured for my convenience:
A switch: Switch 1
A router: Router 1: 10.0.0.2
A DNS server: 10.0.0.1
A DHCP server: 10.0.0.1
A DHCP range: 10.0.0.1 – 10.0.255.254
A Gateway: 10.0.0.2

FreeNAS – double interfaces
Today I finally took the time to make some changes. As an example I will use my FreeNAS VM which has two network interfaces. I will demonstrate how I have placed my interfaces on different networks and how those interfaces are reachable from within my virtual environment on Ravello.
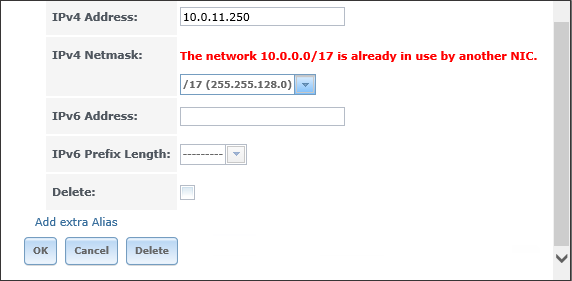
I have redeployed my FreeNAS virtual appliance on Ravello. By default, when I setup a secondary network interface I get hit with the following error: The network xxx.xxx.xxx.xxx /xx is already in use by another NIC. This in not exactly what I want to see because I want to use my FreeNAS VM to provision me with iSCSI storage which I will provide to my ESXi hosts using iSCSI Port Binding.
Of course the error is quite normal because I am only using the a default network assigned to me and the new network I am trying to assign, actually is part of that same defined network.
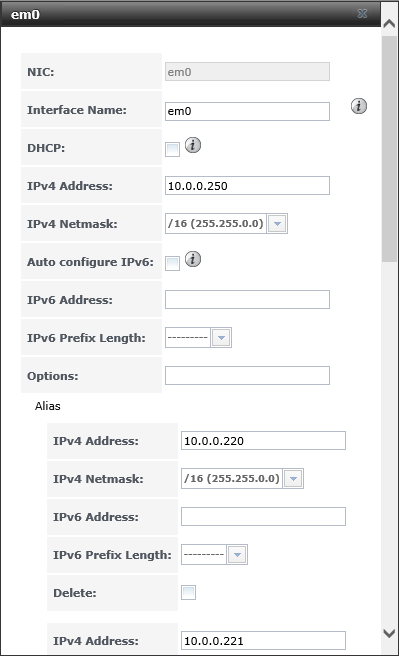
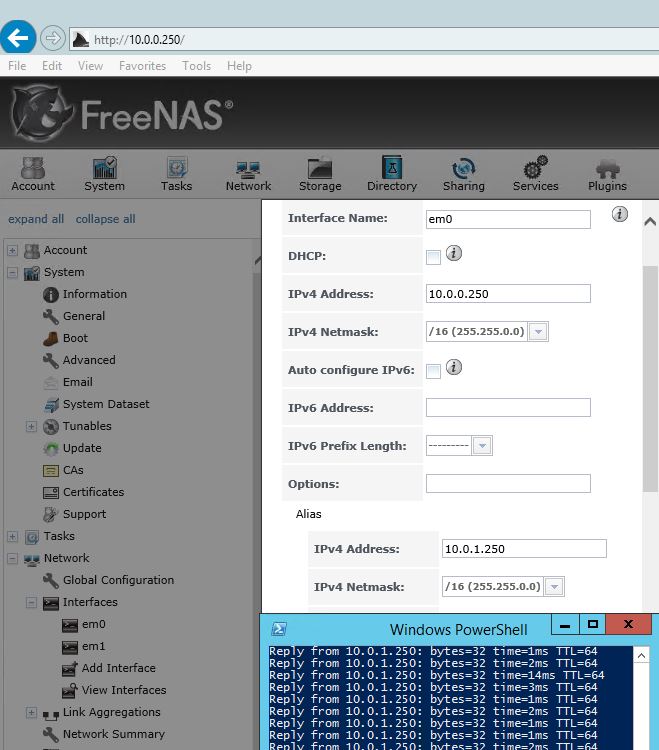
Configuration of interface em0
How to make the necessary changes
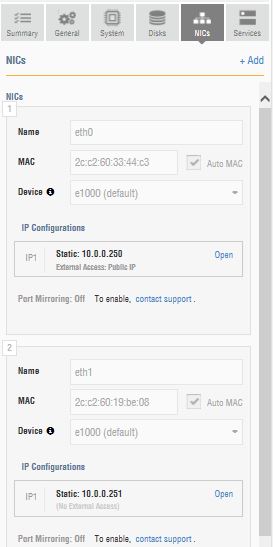
On the Ravello canvas, the network settings for this VM have been configured as follows:
2 network interfaces have been configured and each has been assigned an IP address on the 10.0.0.0/16 network.
In the configuration of FreeNAS we can add network aliases as long as they are routable over the default network. This means we can easily add the following network aliases for 10.0.0.250 /16:
10.0.1.250/16,
10.0.2.250/19,
10.0.3.250/27,
10.0.x.250/31, these will all be routable over 10.0.0.2
However as soon as we want to setup the second interface and try to assign an IP like the one above, we will see the error I have mentioned before: The network xxx.xxx.xxx.xxx /xx is already in use by another NIC.
To solve this we have to define new networks on Ravello. After that we will have to assign this new network to the VM on the canvas ( the outside of the VM) and will also have to assign an IP from this new network inside of the VM.
Create a new Ravello network
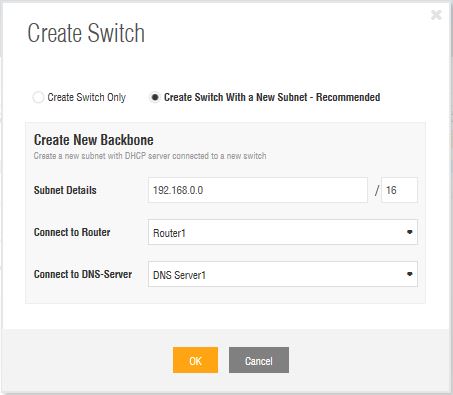
In Ravello we will click on Network, click on Switches and click on the button +Create Switch.
Select Create Switch With a New Subnet – Recommended. We will define the new 192.168.0.0/16 network on Ravello. We will keep the default router and default DNS server and click OK.
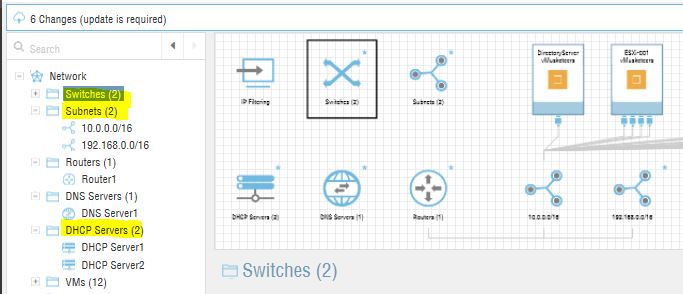
We will see that besides a new Switch also a new Subnet and a new DHCP server have been created.
Now we will assign this new network to the second network adapter on the outside of the FreeNAS VM. we will go back to the Canvas and modify the network settings of this VM and assign this new network to the secondary network adapter on the inside of the VM.
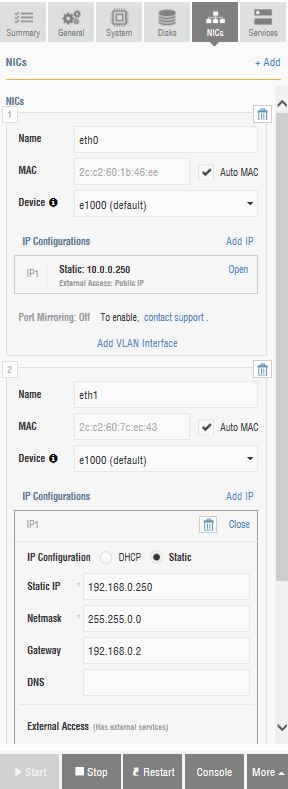
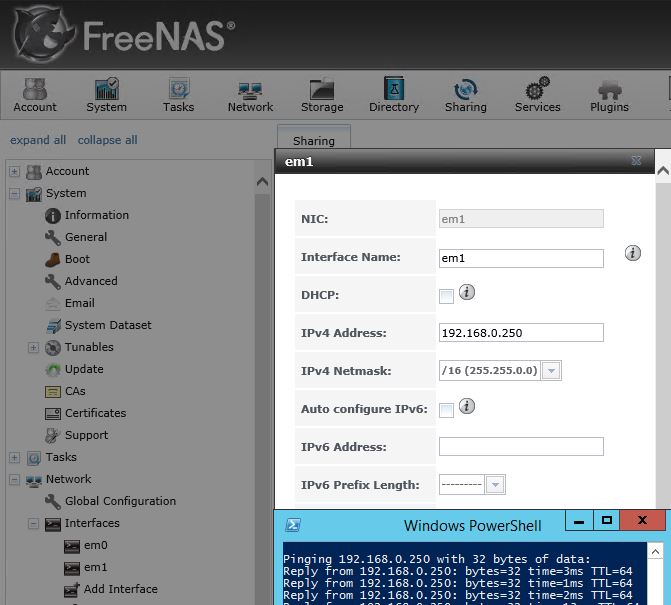
Now open the FreeNAS web-interface from the inside of your virtual environment and modify the secondary adapter in there as well:
In the configuration of FreeNAS we can add network aliases for this secondary adapter as well, as long as they are routable over the default network. This means we can easily add the following network aliases for 192.168.0.250 /16:
192.168..1.250/16,
192.168..2.250/19,
192.168.3.250/27,
192.168.x.250/31, these will all be routable over 10.0.0.2
To add the lower 3 networks you will have to make one last configuration change in the network settings in Ravello. The router itself only created the 192.168.0.2 Gateway, so this means we will have to add the other gateway addresses manually.
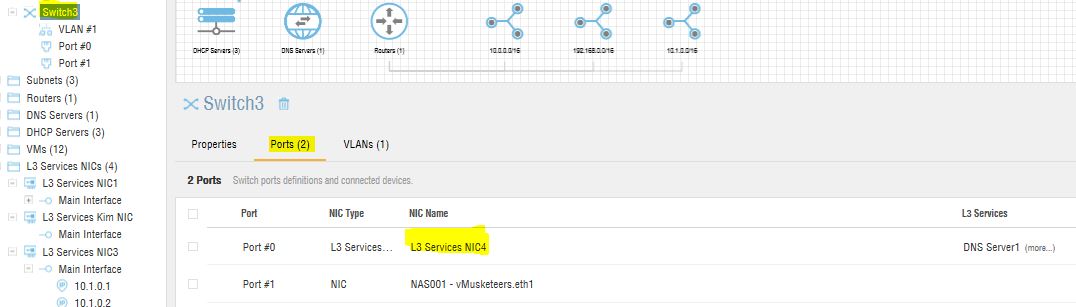
Open the L3 Services NIC for the new Switch. You can find it by selecting the new Switch and checking the connected ports. As you can see here, the L3 Services NIC I have to modify is L3 Services NIC4.
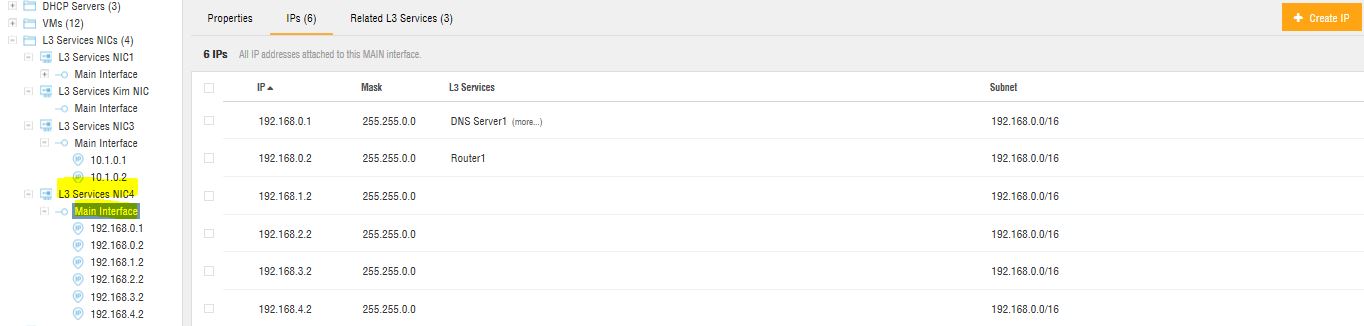
Now open the menu for the L3 Services NIC and open L3 Services NIC4. Click on Main Interface and then select + Create IP. Add the new Gateway IP’s you would like to configure. For ease of use I decided to use 2 as the value for the last octet. This is the value used as a default by Ravello, so we will keep conformity.
And that’s about it.
Conclusion:
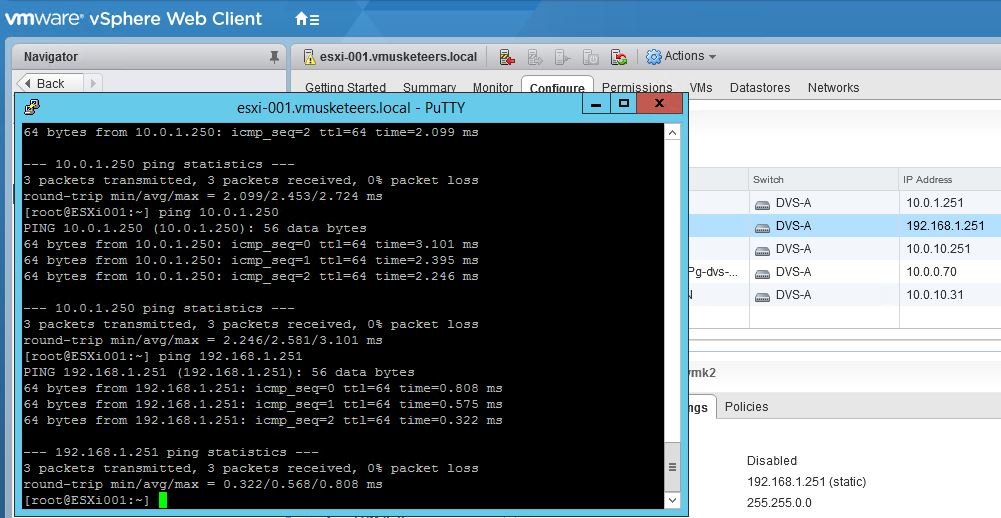
After making these changes, we will not see the error The network xxx.xxx.xxx.xxx /xx is already in use by another NIC and will be able to configure iSCSI portbinding.
Kim
I have added the router/gateway bits. My apologies for forgetting to include these initially.
Kim